Sunday, August 29, 2010

August Daring Bakers: Baked Alaska!

I'm a few days late, but I wanted to post about this still because I did complete the challenge on time. The last few weeks have just been a little nuts-o so I'm late posting!

The August 2010 Daring Bakers’ challenge was hosted by Elissa of 17 and Baking. For the first time, The Daring Bakers partnered with Sugar High Fridays for a co-event and Elissa was the gracious hostess of both. Using the theme of beurre noisette, or browned butter, Elissa chose to challenge Daring Bakers to make a pound cake to be used in either a Baked Alaska or in Ice Cream Petit Fours. The sources for Elissa’s challenge were Gourmet magazine and David Lebovitz’s “The Perfect Scoop”.


Being Syrian, I have been making browned butter for as long as I can remember! When we make hummus, we brown butter and pine nuts in a pan before pouring them over the warm hummis. Delicious! Thankfully, having so much experience browning butter, I had no problem with that part of the challenge. Actually, I found this challenge to be much easier than I expected. I have made quite a bit of ice cream over the summer so that part was easy, and the cake wasn't too hard. The toughest part for me was applying the meringue which wasn't too bad either!

I made the browned butter pound cake and meringue as instructed, but I did substitute the vanilla ice cream for Chocolate-Studded Grand Marnier Ice Cream. To die for! YUM!

Brown Butter Pound Cake


19 tablespoons (9.5 oz) (275g) unsalted (sweet) butter
2 cups (200g) sifted cake flour (not self-rising; sift before measuring) (See “Note” section for cake flour substitution)
1 teaspoon (5g) baking powder
1/2 teaspoon (3g) salt
1/2 cup (110g) packed light brown sugar
1/3 (75g) cup granulated sugar
4 large eggs
1/2 teaspoon pure vanilla extract

1. Preheat the oven to 325°F/160°C and put a rack in the center. Butter and flour a 9”x9” (23cmx23cm) square pan.

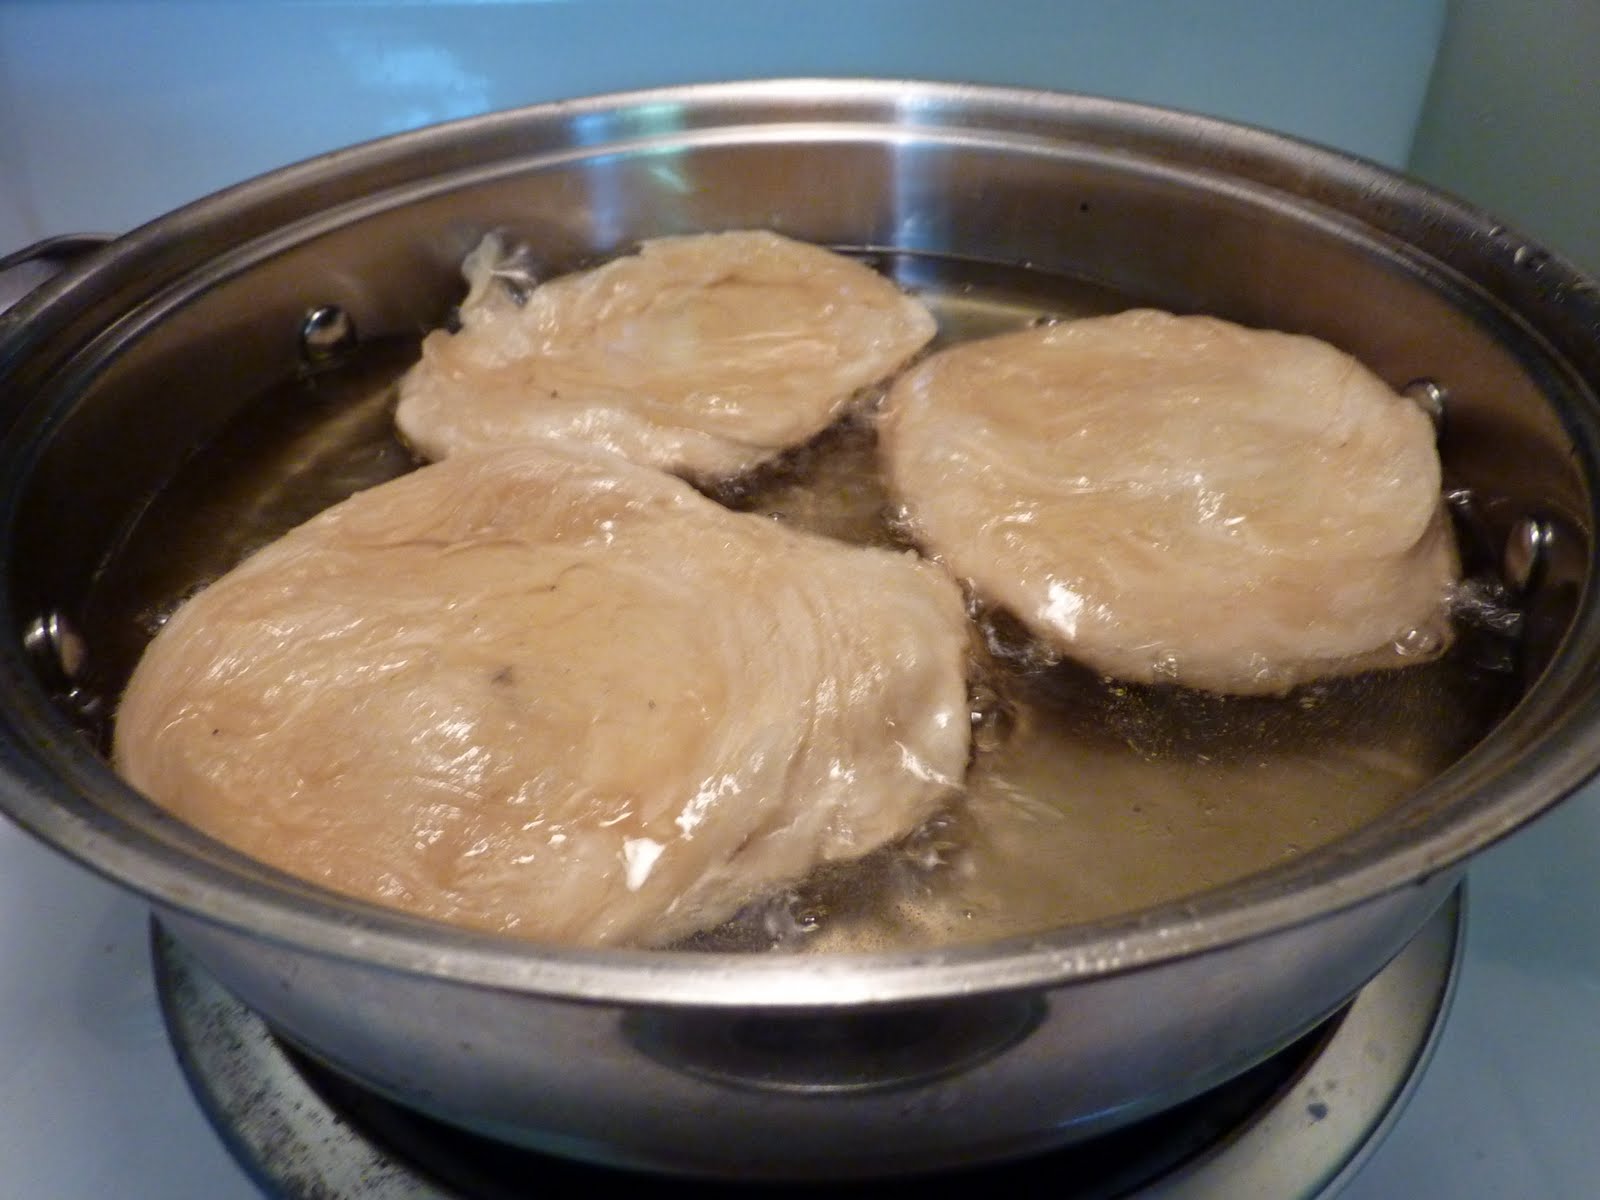
2. Place the butter in a 10” (25cm) skillet over medium heat. Brown the butter until the milk solids are a dark chocolate brown and the butter smells nutty. (Don’t take your eyes off the butter in case it burns.) Pour into a shallow bowl and chill in the freezer until just congealed, 15-30 minutes.


3. Whisk together cake flour, baking powder, and salt.

4. Beat the brown butter, light brown sugar, and granulated sugar in an electric mixer until light and fluffy, about 2 minutes. Beat in the eggs one at a time, mixing well, and then the vanilla extract.

5. Stir in the flour mixture at low speed until just combined.

6. Scrape the batter into the greased and floured 9”x9” (23cmx23cm) square pan. Smooth the top with a rubber spatula and rap the pan on the counter. Bake until golden brown on top and when a toothpick inserted into the center comes out clean, about 25 minutes.

7. Cool in the pan 10 minutes. Run a knife along the edge and invert right-side-up onto a cooling rack to cool completely.

Meringue

8 large egg whites
½ teaspoon (3g) cream of tartar
½ teaspoon (3g) salt
1 cup (220g) sugar

Beat the egg whites, cream of tartar, and salt on high speed in an electric mixer until soft peaks form. Beat in the sugar gradually in a slow stream until stiff peaks form.

Chocolate-Studded Grand Mariner Ice Cream


2 cups heavy (35%) cream
1 cup milk (any type except skim)
3/4 cup sugar
pinch of salt
1/4 cup Grand Marnier or other orange-flavoured liqueur
1/2 cup finely chopped orange-flavoured dark chocolate, such as Terry's Chocolate Orange

1. In a large bowl, mix together the cream, milk, sugar and salt until the sugar is dissolved. Put the Grand Marnier in a small bowl. Refridgerate both the cream mix and the liqueur until completely chilled, about 1 hour or as long as overnight.

2. Stir the Grand Marnier into the cream mixture then freeze in an ice cream maker according to the manufacturer's directions. When churning is complete, fold in the orange-flavoured chocolate bits.Transfer to a freezer-safe container and freeze until semi-firm, approximately 3 hours.

Assembly Instructions – Baked Alaska


1. Line loaf pan with plastic wrap, so that plastic wrap covers all the sides and hangs over the edge. Fill to the top with ice cream. Cover the top with the overhanging plastic wrap and freeze for several hours, or until solid.

2. Level the top of the brown butter pound cake with a serrated knife or with a cake leveler. Cut out four rectangle to fit the bottom of the loaf pan from the cake. Discard the scraps or use for another purpose.

3. Make the meringue (see above.)

4. Unwrap the ice cream loaf and invert on top of a cake rectangle. Trim any extra cake if necessary.

5. Pipe the meringue over the ice cream and cake, or smooth it over with a spatula, so that none of the ice cream or cake is exposed. Freeze for one hour or up to a day.

6. Burn the tips of the meringue with a cooking blow torch. Or, bake the meringue-topped Baked Alaska on a rimmed baking sheet in a 500°F/260°C oven for 5 minutes until lightly golden. Serve immediately.


Monday, August 23, 2010

A Little Pillow of Heaven....

Last week, Andrew and I happened to bump into one of the guys, the MSG as I will call him, that Andrew used to work with at Fort Bragg, who just happened to be here at Lost-in-the-Woods for some training. We were thrilled to see a familiar face, and we invited him over for dinner since his wife did not accompany him here. We thought he'd enjoy a home cooked meal instead of something out of the microwave or from a drive thru!

I made some Caprese Chicken, Roasted Garlic Potatoes (amazing!), and some sauteed zucchini and yellow squash. It was a great meal as most of it came from our garden, the farmer's market, or the local farm where we buy most of our meat from. It's amazing what a difference food makes when it's really fresh and raised without loads of hormones and pesticides!

The crowing jewel of the meal with the pavlova I whipped up for dessert. I knew the MSG ate a relatively healthy diet so I thought pavlova would be a nice light change to a typical dessert. I have loads of egg whites in the freezer that I have been waiting to use for some time now. I figured it would be nice and easy to make a pavlova ahead of time and have it waiting in the fridge. I used some of the fresh fruit at the store, and I spread some of the fresh apricot preserves I recently made on top. DELICIOUS!! Good thing Andrew's friends at work love anything he brings in because it will be going to class with him tomorrow! Otherwise, I'll sit here all day picking away at it. Needless to say, this little gem will definitely be going in the keeper box of recipes.


Pavlova with Fresh Fruit
(adapted from Simply...Gluten Free)
Ingredients
8 egg whites
pinch of Kosher salt
2 1/4 cups sugar, divided
2 teaspoons white vinegar
2 teaspoons vanilla 
2 teaspoons cornstarch
2 cups heavy whipping cream
Fresh fruit
1/2 cup apricot preserves

1. Preheat oven to 200 degrees. Place silpat mat or parchment paper of baking sheet. Beat egg whites with salt in a large mixing bowl until they start to firm up, about 1 minute. With the mixer going slowly add the sugar and continue to beat until it forms firm, shiny peaks, about 2 minutes.
2. Sift the cornstarch onto the egg whites and add the vinegar and vanilla. Fold lightly with a spatula. Pile the egg white mixture onto the parchment paper in two separate piles and gently smooth the mixture to form a  circle starting from the middle and working out in all directions until you have a round disk.
3. Bake for 1 ½ hours and then turn off the oven and let cool completely in the oven.

4. Beat heavy whipping cream with 1/4 cup of sugar until it forms soft peaks. Do not over beat.
5. When the Pavlova is completely cooled, peel off the parchment paper and place one Pavlova on serving platter. Spread whipped cream evenly over the Pavlova, and then brush with 1/4 cup of apricot preserves. Place second Pavlova on top of the first. Spread remaining whipped cream on top. Pile fresh fruit ( I used yellow kiwi, strawberries, and nectarines) on whipped cream, and then brush with remaining apricot preserves.

It's like a little pillow of heaven! So good and not too sweet!

Friday, August 20, 2010

Come Away With Me

This past Wednesday, Andrew and I celebrated three wonderful years of married life. For all of the ups and downs and crazy turns, I definitely wouldn't change a thing. We are so blessed in so many ways, and we have had so many crazy and wonderful experiences over the past several years. We have only grown closer, and I cannot wait to spend my forever with him.


In celebration of our three year anniversary, we got each other traditional gifts of leather. Andrew got a new seat for his road bike, and I got new sunglasses which came with a leather case. We also had an incredible dinner! Before we were married, I worked as an assistant to the community relations coordinator at my alma mater, Grand Valley State University. With this job, I spent a great deal of time workin closely with the catering staff and event planners at the university. Since we were having our reception at the Alumni House, my friend, Kenn, over in catering and I planned every last detail of the menu together. It was to die for! We had so much fun planning all of the courses, and once the wedding day came around, Kenn had some surprises of his own. It is definitely not a meal we will soon forget.


Being the adventerous novice chef that I am, I decided to attempt to recreate our wedding reception meal while taking a few liberties. Our at home recreation looked something like this:


Greek Salad with my Dad's Homemade Dressing

Filet Mignon with a Cherry Glace
Haricots Verts with Herb Butter
Hasselback Potatoes

Almond Layer Cake with Almond Buttercream Frosting

And now the photos and recipes:

Greek Salad

Ingredients
2 cups mixed greens
1 Tomato, sliced
1 Cucumber, thinly sliced or diced
8 Kalamata olives (optional)
1/2 cup feta cheese, crumbled
Greek Dressing (see recipe below)

1. Place mixed green on two plates. Distribute tomato, cucumber olives, and feta on top of greens.
2. Drizzle each salad with dressing and serve.

Greek Dressing

Ingredients
1/2 cup olive oil
1/4 cup red wine vinegar
1 teaspoon oregano
2 tablespoons dijon mustard
1-2 garlic cloves, mashed
1/2 teaspoon salt
pepper to taste

1. Combine all ingredients in a bowl and whisk together well. Serve on top of mixed greens.

Haricort Verts with Herb Butter
(recipe courtesy of Gourmet)

Ingredients
5 tablespoons unsalted butter, softened
3 tablespoons finely chopped shallots
3 tablespoons finely chopped flat-leaf parsley
2 teaspoons finely chopped tarragon (I used dried)
1 1/2 teaspoons grated lemon zest
1 tablespoon fresh lemon juice
2 lb haricots verts or other green beans, trimmed

Stir together all ingredients except haricots verts with 3/4 teaspoon salt and 1/4 teaspoon pepper in a large bowl until combined well.

Cook beans in a large pot of boiling salted water (1 tablespoon salt for 6 quarts water), uncovered, until crisp-tender, about 6 minutes, then drain. Toss with herb butter.


Hasselback potatoes with Herbs de Provence

Ingredients
4 small potatoes

1 clove fresh garlic, very thinly sliced
1 tablespoon butter
2 tablespoons olive oil
1 teaspoon Herbs de Provence
2 tablespoons sour cream
fresh chives
Kosher salt and pepper

1. Preheat oven to 400 degrees. Lay each potato on its flattest side. With a potato peeler, peel the skin off the tops of each potato, but leave the bottoms of the skins in tact.
2. Take a sharp knife, and very carefully cut thin slices all along the tops of the potatoes, about two thirds to three quarters of the way down. Be careful not to slice all the way to the bottom. Slide a garlic slice or two into a couple of the slits of each potato.

3. Place potatoes on a parchment paper lined baking sheet. Rub butter on top of each potatoes and drizzle with olive oil. Sprinkle with salt, pepper and Herbs de Provence.
4. Bake for 1 hour or until the tops are golden and crispy. Dollop with sour cream, and garnish with chives.


Filet Mignon with Cherry-Balsamic Reduction

Ingredients
2 local raised, grass fed filet mignon
1 tablespoon olive oil
salt and pepper
Dried Cherry Glace (recipe to follow)

1. Generously season each filet with salt and pepper on both sides.
2. Heat the olive oil in a pan over medium-high heat until it begins to smoke. Using tongs, place each filet in the pan.
3. Sear steaks for 3-4 minutes of each side (longer if you like it more well done). Let steak rest for 5 minutes prior to serving.


Dried Cherry Glace

Ingredients
2 shallots, finely diced
2 garlic cloves, mashed
2 tablespoons olive oil
Kosher salt and pepper
1 1/2 cup chicken stock
2 tablespoons balsamic vinegar
1/2 - 3/4 cup dried cherries

1. Heat olive oil in small saucepan. Add shallots and garlic, season with salt and pepper. Saute until soft, about 5-7 minutes.
2.  Add chicken stock and simmer until reduced by almost half. Add cherries and balsamic and continue to simmer for 10 minutes or until cherries are plump and sauce has thickened. Pour of steaks, pork or chicken.

Almond Layer Cake
(adapted from Magnolia Bakery's Traditional White Birthday Cake recipe)

Ingredients
1 1/2 cups self-rising flour

1 cup finely ground almond meal
1/4 cup all purpose flour
1 cup (2 sticks) unsalted butter, softened
2 cups sugar
4 large eggs, at room temperature
1 cup milk
1 teaspoon vanilla extract
1 teaspoon almond extract

Preheat oven to 350 degrees F.


1. Grease and lightly flour two 9 inch round cake pans. Cut parchment paper into circles to place in the bottom of each cake pan.
2. In a small bowl, combine the flours. Set aside.
3. In a large bowl, on the medium speed of an electric mixer, cream the butter until smooth. Add the sugar gradually and beat until fluffy, about 3 minutes.
4. Add the eggs, one at a time, beating well after each addition.
5. Add the dry ingredients in 3 parts, alternating with the milk and vanilla. With each addition, beat until the ingredients are incorporated but do not over beat. Using a rubber spatula, scrape down the batter in the bowl to make sure the ingredients are well blended.
6. Divide batter among the cake pans. Bake for 20 to 25 minutes or until a cake tester inserted into center of cake comes out clean. Let cakes cool in the pans for 10 minutes. Remove from pans and cool completely on wire rack.

Almond Buttercream Frosting
(adapted from Magnolia Bakery's Vanilla Buttercream Frosting recipe)

Ingredients
1 cups (2 sticks) unsalted butter, very soft

8 cups confectioners' sugar
1/2 cup milk
1 teasponn vanilla extract
1 1/2 teaspoons almond extract

1. Place the butter in a large mixing bowl. Add 4 cups of the sugar and then the milk and the vanilla  and almond extracts.
2. Beat until smooth and creamy. Gradually add the remaining sugar, 1 cup at a time, until icing is thick enough to be of good spreading consistency (you may very well not need all of the sugar). Use and store icing at room temperature, as icing will set if chilled. Can store in an airtight container for up to three days.

Tuesday, August 17, 2010

My friend Beth, the Sandwich Queen!

My friend Beth, who blogs over at This American Wife, has been a lifesaver over the past few weeks on the recipe front. I have been feeling anything but motivated recently when it comes to menu planning, and she passed along some awesome, easy, and delicious recipes. She had a post recently about Yummy Summer Eats, and she said they were delicious so I had to give them a try.

The first night, marinated a pork tenderloin in a Maple Garlic Glaze.

Pork Tenderloin with Maple Garlic Glaze

(via AllRecipes.com)

2 tablespoons dijon mustard
1 teaspoon sesame oil
3 cloves garlic, minced
fresh ground black pepper, to taste
1 cup maple syrup
1 1/2 pounds pork tenderloin

1. Combine mustard, sesame oil, garlic, pepper and maple syrup. Place pork in a shallow dish and coat thoroughly with marinade. Cover, then chill in the refrigerator at least eight hours, or overnight.

2. Preheat oven to 450 degrees. Sear tenderloin on all sides in a large, oven-safe skillet. Pour marinade over pork and transfer skillet to oven. Roast for 20 minutes or until pork reaches internal temperature of 145 degrees.

The second night, I made Pork Tortas using the left over tenderloin. DELICIOUS! They were so easy and so good!


Pork Tortas

(adapted from Cooking Light Magazine)
1/2 the Maple Garlic Glazed Pork Tenderloin, sliced thinly
1 (12 oz) baguette, cut in half horizontally
3/4 cup canned pinto beans
1/2 cup refrigerated fresh salsa ( I like Muir Glen Garlic Cilantro)
4 slices Swiss Cheese
1/4 cup thinly sliced onion
1 large tomato, cut into 8 slices
1/2 ripe peeled avocado, cut into 1/8 inch thick slices
Garlic Aioli (see recipe below)

1. Hollow out top and bottom halves of bread, leaving a 3/4-inch-thick shell. Place bread halves, cut sides up, on a baking sheet. Broil 2 minutes or until golden brown.

2. Place beans and salsa in a small bowl; mash with a fork until almost smooth. Spoon bean mixture into the bottom half of baguette. Top with pork and cheese. Place sandwich bottoms back under broiler to melt cheese.

3. Spread garlic aioli on the top half of baguette. Top sandwiches with onion, tomato, jalapeno, avocado and top half of baguette. Cut into 4 pieces. Yield: 4 servings)

Garlic Aioli
1/2 cup light mayonnaise
2 teaspoons dijon mustard
1 garlic clove, mashed
2 tablespoons fresh lemon juice

Combine all ingredients well in a small bowl.
(Sorry I don't have a better photo!)

Nuevo Cubano Sandwiches
(adapted from Cooking Light Magazine)

Ingredients

4 (3-ounce) whole-wheat sub rolls, cut in half lengthwise
1/4 cup chopped fresh cilantro
1 1/2 tablespoons fresh lime juice
1/4 teaspoon chili powder
2 garlic cloves, minced
1 (15-ounce) can no-salt-added black beans, rinsed and drained
1/4 pound thinly sliced reduced-sodium deli ham
1 peeled mango, thinly sliced
1/4 pound thinly sliced Swiss cheese
2 tablespoons olive oil, divided

Preparation
1. Hollow out top and bottom halves of bread, leaving a 1/2-inch-thick shell; reserve torn bread for another use.

2. Combine cilantro, lime juice, chili powder, garlic, and black beans in a medium bowl; mash with a fork or potato masher until almost smooth and spreadable, adding a few drops of water, if necessary. Spread bean mixture evenly on bottom halves of the prepared rolls. Layer rolls evenly with ham, mango, and Swiss cheese; replace top halves of rolls.

3. Heat 1 tablespoon olive oil in a large skillet over medium heat for 5 minutes. Add 2 sandwiches to pan; place a cast-iron or other heavy skillet on top of sandwiches; press gently. Cook 2 to 3 minutes on each side or until sandwiches are golden brown (leave cast-iron skillet on sandwiches while they cook). Remove sandwiches from pan; repeat procedure with remaining 1 tablespoon oil and 2 sandwiches.

Thanks, Beth, for the great recipes! You're a lifesaver!

Saturday, August 14, 2010

Daring Cooks August Challenge - Pierogis!

The August 2010 Daring Cooks’ Challenge was hosted by LizG of Bits n’ Bites and Anula of Anula’s Kitchen. They chose to challenge Daring Cooks to make pierogi from scratch and an optional challenge to provide one filling that best represents their locale.

Although I have been a Daring Bakers for many months now, this was my first time completing a challenge with the Daring Cooks. Being that I have quite a bit of free time in the kitchen here in Missouri, I thought it would be a good time to try out some new skills.

My first Daring Cooks challenge was sponsored by LizG of Bits n’ Bites and Anula of Anula’s Kitchen. We were to make pierogis with one of two dumpling recipes and a filling(s) of our choosing. Being from the Westside of Grand Rapids, I grew up around many Polish families. One of my dear friends, Amanda, makes pierogis several times a year with her in-laws, and I was so excited to tell her about my venture into her world!

Since this would be my first Daring Cooks challenge, I decided to try quite a few fillings.

Potato and Roasted Garlic


Caramelized Onion and Cabbage


Rum and Orange Juice Grilled Pineapple


Pumpkin with Marshmallows and Maple Syrup

Personally, I wasn't crazy about the sweet pierogis. They weren't sweet enough for me even though I put a Gran Marnier cream sauce over them. I felt that the dough was too overpowering in its lack of flavor and slimey texture.

Dough Recipe
½ cup (125 ml) milk (can be whole milk, 2% or skim milk)
½ cup (125 ml) whipping cream
3 large egg whites
1 tsp (5 ml) salt
3 cups (450 gm) all-purpose flour


1. Mix flour and salt, add other ingredients, and knead dough until you have a smooth dough. (I kneaded this dough quite a bit, and it yielded a nice, pliable dough)
2. On a floured surface roll out fairly thin (1/8” or about 3 millimeters), cut into 2” (5 cm) squares, and fill with 1 tsp filling.

Originally, the dough came together really well for me. It rolled out perfectly and I was able to easily form the individual pierogis. Once I started working with it longer though, I found that the dough would shrink up after I cut into circles, and it really made a mess!
 
Directions
1. Combine all the ingredients for the filling (it’s best to use one’s hands to do that) put into the bowl, cover and set aside in the fridge until you have to use it.
2. Place 2 cups flour in a large bowl or on a work surface and make a well in the center. Break the egg into it, add the salt and a little lukewarm at a time (in my situation 1/2 cup was enough). Bring the dough together, kneading well and adding more flour or water as necessary. Cover the dough with a bowl or towel. You’re aiming for soft dough. Let it rest 20 minutes.
3. On a floured work surface, roll the dough out thinly (1/8” or about 3 millimeters) cut with a 2-inch (5 cm) round or glass (personally I used 4-inch/10 cm cutter as it makes nice size pierogi - this way I got around 30 of them and 1 full, heaped teaspoon of filling is perfect for that size). Spoon a portion (teaspoon will be the best) of the filling into the middle of each circle. Fold dough in half and pinch edges together. Gather scraps, re-roll and fill. Repeat with remaining dough.

5. Serve immediately preferably with creme fraiche or fry. Cold pierogi can be fried. Boiled Russian pierogi can be easily frozen and boiled taken out straight from the freezer.

Pierogis waiting to be pan fried!


Caramelized Onion and Cabbage Filling
 
Potato and Roasted Garlic Filling

Sweet Pierogis with Gran Mariner Cream Sauce

Pineapple Filling

Wednesday, August 11, 2010

Crazy, Syrian Woman


So, as you may or may not know, I am half Syrian on my mom's side. Thankfully, as I grew up, I was often in the kitchen with my mom and also with my Tete (Grandma) until she passed away. I was able to learn so much from them about making Syrian food and also about family traditions. I am so grateful for this time spent with both of them. Although I don't know everything there is to know about Syrian cooking, I've gleaned as much as I can from these experiences, and as my mom will tell you, I call her all the time for help and tips when I try traditional recipes.

Recently, in the wonderful world of food blogging, I came across my sister from another mister, Dimah. No, she doesn't have a clue who I am, but I think she is pretty much the greatest person....ever. She blogs over at Orange Blossom Water, and she is Syrian. She lives in Syria, and she blogs almost entirely about Syrian cooking/baking. She, like me, learned from her mother, and she shares as much as she can about what she learns. I pretty much am in love with her. (That's not at all creepy, right.....?)


Like every good, Syrian woman, I have a trusty bottle of Orange Blossom Water handy at all times!

While browsing her blog, I came across a killer recipe for Bsaisat which is a Syrian dessert made by working and rolling out dough and then flattening it out before frying it and dunking it in sugar syrup. A-M-A-Z-I-N-G! I knew I just had to try this recipe. The funny thing is, once I told my mom about the recipe, she told me my tete used to make them with my aunt long before I was born. I really feel such a strong connection to my tete, and I think it's so ironic when I have a link to her I never even knew about or could have predicted.

I knew this recipe would take most of the day, but I had all of the ingredients so I thought I would give it a try. I first had to start with A'Jineh Mwarraqah, the dough, and then finishing with the frying and soaking. Since most of the recipe references photos taken by Dimah, I won't copy and paste it here, but you can see the full recipe in the link above. I will just post some photos of my process here.


A few notes after the fact:
- Next time, I will make the dough balls a bit smaller
- I'm not sure how Dimah got so many fluffy looking layers in hers. I even decided to use my hands versus the rolling pin for the final role out in hopes of keeping some of the fluff
- When I fried the second batch, I noticed the lower temperature seemed to bring out a few more layers

I will definitely make these again! Although the dough took a bit of time, it was very simple to make, and the end result was delicious!

Tuesday, August 10, 2010

Peanut Butter-Chocolate Pancakes and a Guinness Night!

We wrapped up the weekend by just vegging out at home on Sunday until I headed out to the USO to volunteer for the afternoon. Andrew knows I have a strange urge to try every pancakes recipe I can find. Even when I find one I love, I always feel the need to try another. I think it's because at their basic ingredients, pancakes are super simple, but there is so much you can do with them! Since Andrew and I both love peanut butter and chocolate I thought I would try a recipe I found for Peanut Butter-Chocolate Swirl Pancakes I found on Foodgawker and adapted a bit. I loved the swirl in the pancakes!

Peanut Butter-Chocolate Swirl Pancakes

Chocolate Batter
1/4 cup unbleached all purpose flour
1/2 cup whole wheat flour
1/4 cup cocoa powder
1 teaspoon baking powder
1/2 teaspoon baking soda
3/4 cup milk
1 egg
1 tablespoon butter melted

Peanut Butter Batter
1/2 cup unbleached all purposed flour
1/2 cup whole wheat flour
1 teaspoon baking powder
1/2 teaspoon baking soda
3/4 cup milk
1 egg
1 tablespoon melted butter
2 tablespoons natural smooth peanut butter

Banana Topping
2 ripe bananas
1/4 cup milk
1 tablespoon maple syrup

Directions
In a medium bowl, combine all the dry ingredients for chocolate batter. Stir in milk, egg, and melted butter until batter comes together. If batter is still a little thick (should be easily pourable) add in a little more milk. Set aside and repeat with peanut butter batter in a separate bowl.

Heat a skillet over medium heat. Scoop about a fourth of the chocolate batter and smooth out to a circle. Take the peanut butter batter and drizzle two lines across the chocolate pancake. With a knife, swirl the peanut butter into the chocolate part of the pancake. Continue, reversing every other pancake (so you will also have peanut butter pancakes with a chocolate swirl.) Cook on one side until little bubbles form on the surface. Flip the pancake and continue to cook until pancake is done.

If you are making a lot of pancakes, turn your oven on to 200˚ to keep pancakes warm until you are ready to serve.

To make banana topping, combine the three ingredients in a bowl and mash with a fork until banana is slightly chunky.
 

Since Andrew is a diehard Guinness lover, I thought I would do a Guinness themed dinner for him since he's been under a lot of stress lately with his Army classes and Masters classes going simultaneously.

I started by making the custard base for Guinness-Malt Ice Cream which I sadly don't have a photo of. Although in the end this ice cream was delicious, it would NOT come together in the ice cream maker. It ran for well over an hour without even getting a yogurt like consistency. I finally just poped it in the freezer in a plastic container and it came together well. Andrew said it was great!


I also made Guinness Battered Onion Rings which were KILLER!
 
Guinness Battered Onion Rings

3 onions sliced in 1/2 inch slices
About 1 1/2 cups milk
1 1/2 cups flour
12 ounces Guinness Extra Stout beer
1 extra large egg, separated
1 teaspoon salt
4 cups canola oil

Put the onion slices in a medium bowl and pour the milk over them. (I had some leftover Guinness from the ice cream so I dumped this in as well. I honestly, don't think it made a difference.) Let them sit about an hour (I let them sit for the afternoon), tossing occasionally. In another medium bowl, mix the Guinness into the flour while stirring. Stir in the egg yolk and salt. Let sit for about one hour. Just before deep frying, beat the egg whites until stiff. Gently fold the egg white into the beer batter. ( I really think the egg white made all the difference!)
Over medium high heat, heat the oil in a medium size pot or deep fryer to 350 degrees. Line a baking sheet with several layers of paper towels. Drain the milk from the onions and put them into the batter. Carefully drop onion slices in the hot oil, one at a time without overcrowding. Add only as many as you can so they do not overlap. You'll need to make several batches, but since they cook so quickly it will go fast. Using 2 forks or tongs, turn the onions when they are brown on one side. Remove from the oil when both sides are a golden brown and put on the paper towel lined baking sheet. They brown within a few minutes, so keep an eye on them. Keep frying the onion slices until all are fried.

Sprinkle with salt and serve hot.

The main event were the Guinness Burgers which I personally thought were a bit disappointing. Andrew thought they were good, but I didn't think they were anything special.


Guinness Burgers

Ingredients:
1 pound locally raised, grass fed ground beef
2/3 cup Guinness Stout
1 red onion, finely diced
4 bacon slices, finely diced
1 teaspoon creamed horseradish
1 large egg, beaten
1/2 teaspoon paprika
2 heaping tablespoons all-purpose flour

1.The night before you want to make these, lay the ground beef out is a shallow dish and cover with the Guinness. Using your hands, massage the Guinness into the meat, cover with plastic wrap and let marinate in the fridge for at least 12 hours. ( I only refrigerated it for about 8 hours.)

2.When ready to form the burgers, saute the onion and bacon in a skillet until the onion is lightly browned and the bacon is crisped to your liking. Pour the mix into a fine mesh seive to drain away any excess bacon fat and set aside to cool.

3.Lift the beef out of the marinade and gently squeeze any excess Guinness from the meat. Place the meat in a large bowl, add the onion bacon mixture, the horseradish, egg and paprika. Season with salt and pepper and sprinkle the flour over. Using your hands, mix together well. Divide the mix into 4 equal portions and form into round patties, about 1 1/2 inches thick. Carefully lay the patties on a non-stick baking sheet and top with plastic film. Refrigerate for at least 1 hour, and up to 6 hours to firm up.

5.When ready to cook the burgers, lightly oil a cast iron (or non-stick) frying pan. Heat over a medium-high flame until just beginning to smoke, add the burgers and cook for a bout 5 minutes on each side, until well browned on the outside. Because the Guinness stains the meat, a medium-rare burger will not be rosy pink inside, so you will need to go by feel to know when they are done. The burgers should resist slightly in the center (and not be too mushy), when cooked to medium rare.

We served these just like regular burgers on a bun with all the condiments. I really felt that the horseradish was overpowering, and I couldn't really taste the Guinness.