Tuesday, December 29, 2009

Daring Bakers December 2009 - Gingerbread Houses!


This month, the Daring Bakers were tasked with making Gingerbread Houses. When I was very young, my mom used to making very extravagent gingerbread houses with her 5th grade students and then enter them into a local contest. I figured if she did it so well, it must be in the blood! I was really looking forward to this challenge as it offered a creative outlet during this super busy and hectic time of year.

I decided that I would make a fancy gingerbread house here at home with my husband's help, and then we would make a more lighthearted and fun one with my parents back home in Michigan. After reading many of the comments on the DB board, I decided to go with the Good Housekeeping recipe for my dough and the Royal Icing Recipe from the DB:

Royal Icing

1 large egg white
3 cups (330g) powdered sugar
1 teaspoon white vinegar
1 teaspoon almond extract

Beat all ingredients until smooth, adding the powdered sugar gradually to get the desired consistency. Pipe on pieces and allow to dry before assembling. If you aren't using it all at once you can keep it in a small bowl, loosely covered with a damp towel for a few hours until ready to use. You may have to beat it slightly to get it an even consistency if the top sets up a bit. Piped on the house, this will set up hard over time.


Since I wanted to make a traditional house for the first try, we chose the Colonial from Bob Vila's website. The template can be found here: http://www.bobvila.com/Downloads/Gingerbread_Colonial.pdf
 
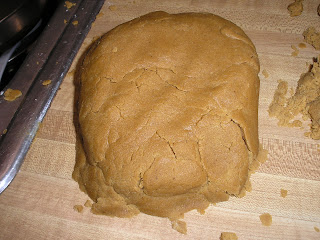
I made the dough a few days in advance when I had a bit of time, and I found it to be rather dry.


Thankfully, when I rolled the dough out several days later, I didn't have many problems once the dough softened slightly.

Unfortunately, my oven does not cook evenly at all, and I had some trouble baking the pieces to the color and doneness I wanted. (Thankfully, Santa brought me an oven thermometer so now I can monitor it better!)


It was rather tedious cutting out all of the windows, but in the end I think it was totally worth it! In hindsight, I now know that I can trim the pieces when they first come out of the oven. This would have saved us some headache when we were putting the pieces together.

I decided that I did not want empty windows so I made some hard candy. I had some trouble with it as I think the butter in the candy may have browned. Instead of clear windows they were more opaque, but in the end I love the way the windows turned out!

I don't have any photos of the frosting before I applied it to the house, but our first batch was more like playdough than frosting. I think it had something to do with the fact that it was a rainy day, but it actually worked very well to put the wall up with. We also decorated the 4 walls before putting them up as it was much easier this way!


We waited 24 hours before putting the roof on, and this is where we ran into a slight problem. My second batch of frosting was much softer and more like it should have been. Our roof was also not perfectly square so we had a tough time getting it to stay on. We were able to rest the corners on the walls, and it worked out just fine in the end.

And the finished product......


When we went back to Michigan for Christmas, we made another 'house' with my parents. My dad used the same recipes as above, but this time we made a gingerbread trailer. We were inspired by the designs here: http://www.theeayc.com/gallery/ginger/index.html. Fabulous!

My husband free handed the template with a pencil and a ruler, but unfortunately, I don't have any photos of his pattern. Overall, I think this came out pretty awesome!

We cut up one of our family's Christmas cards to put in the window, and we also had to put a photo of our 'favorite' person Sarah Palin in the window too! ;)


Saturday, December 26, 2009

December Daring Bakers Challenge - Gingerbread House

Just wanted to write a quick note that I will be posting my houses next week. I am traveling Dec 23-27, and I do not have my own computer with me.

Happy Holidays!

Sunday, November 29, 2009

November Daring Bakers Challenge - Cannoli!

After semi-mastering the art of macaroons last month, I went into November thinking I could definitely handle whatever the DB's threw at me this month. I greatly enjoyed furthering my baking skills and trying new things so this month I was looking forward to more of the same.

My dad joined the DB's this month, and since he was going to be visiting with the rest of my family for Thanksgiving, we decided to do the cannoli challenge together. We really enjoy cooking and baking together but since we live so far apart, we often don't have time to. My dad and I both love cannoli so we were very excited about attempting to make them together.

I was actually very lucky that we were able to bake together since the Wednesday before Thanksgiving I had to have three stitches in my hand. I wasn't much help in the kitchen at all since I couldn't get it wet or use my thumb much at all!

The directions from the Daring Bakers website are as follows:

Lidisano’s Cannoli


Makes 22-24 4-inch cannoli


Prep time:


Dough – 2 hours and 10-20 minutes, including resting time, and depending on whether you do it by hand or machine.


Filling – 5-10 minutes plus chilling time (about 2 hours or more)


Frying – 1-2 minutes per cannoli


Assemble – 20–30 minutes


RECIPE NOTE: THE EQUIVALENTS FROM THIS RECIPE WERE PREPARED USING THIS CONVERSION SITE: http://www.gourmetsleuth.com/index.asp.


CANNOLI SHELLS


2 cups (250 grams/8.82 ounces) all-purpose flour
2 tablespoons(28 grams/1 ounce) sugar
1 teaspoon (5 grams/0.06 ounces) unsweetened baking cocoa powder
1/2 teaspoon (1.15 grams/0.04 ounces) ground cinnamon
1/2 teaspoon (approx. 3 grams/0.11 ounces) salt
3 tablespoons (42 grams/1.5 ounces) vegetable or olive oil
1 teaspoon (5 grams/0.18 ounces) white wine vinegar
Approximately 1/2 cup (approx. 59 grams/approx. 4 fluid ounces/approx. 125 ml) sweet Marsala or any white or red wine you have on hand
1 large egg, separated (you will need the egg white but not the yolk)
Vegetable or any neutral oil for frying – about 2 quarts (8 cups/approx. 2 litres)
1/2 cup (approx. 62 grams/2 ounces) toasted, chopped pistachio nuts, mini chocolate chips/grated chocolate and/or candied or plain zests, fruits etc.. for garnish
Confectioners' sugar


Note - If you want a chocolate cannoli dough, substitute a few tablespoons of the flour (about 25%) with a few tablespoons of dark, unsweetened cocoa powder (Dutch process) and a little more wine until you have a workable dough (Thanks to Audax).


CANNOLI FILLING


2 lbs (approx. 3.5 cups/approx. 1 kg/32 ounces) ricotta cheese, drained
1 2/3 cups cup (160 grams/6 ounces) confectioner’s sugar, (more or less, depending on how sweet you want it), sifted
1/2 teaspoon (1.15 grams/0.04 ounces) ground cinnamon
1 teaspoon (4 grams/0.15 ounces) pure vanilla extract or the beans from one vanilla bean
3 tablespoons (approx. 28 grams/approx. 1 ounce) finely chopped good quality chocolate of your choice
2 tablespoons (12 grams/0.42 ounces) of finely chopped, candied orange peel, or the grated zest of one small to medium orange
3 tablespoons (23 grams/0.81 ounce) toasted, finely chopped pistachios


Note - If you want chocolate ricotta filling, add a few tablespoons of dark, unsweetened cocoa powder to the above recipe, and thin it out with a few drops of warm water if too thick to pipe.


DIRECTIONS FOR SHELLS:


1. In the bowl of an electric stand mixer or food processor, combine the flour, sugar, cocoa, cinnamon, and salt. Stir in the oil, vinegar, and enough of the wine to make a soft dough. Turn the dough out onto a lightly floured surface and knead until smooth and well blended, about 2 minutes. Shape the dough into a ball. Cover with plastic wrap and let rest in the fridge from 2 hours to overnight.


2 Cut the dough into two pieces. Keep the remaining dough covered while you work. Lightly flour a large cutting or pastry board and roll the dough until super thin, about 1/16 to 1/8” thick (An area of about 13 inches by 18 inches should give you that). Cut out 3 to 5-inch circles (3-inch – small/medium; 4-inch – medium/large; 5-inch;- large. Your choice). Roll the cut out circle into an oval, rolling it larger and thinner if it’s shrunk a little.


3 Oil the outside of the cannoli tubes (You only have to do this once, as the oil from the deep fry will keep them well, uhh, oiled..lol). Roll a dough oval from the long side (If square, position like a diamond, and place tube/form on the corner closest to you, then roll) around each tube/form and dab a little egg white on the dough where the edges overlap. (Avoid getting egg white on the tube, or the pastry will stick to it.) Press well to seal. Set aside to let the egg white seal dry a little.


4. In a deep heavy saucepan, pour enough oil to reach a depth of 3 inches, or if using an electric deep-fryer, follow the manufacturer's directions. Heat the oil to 375°F (190 °C) on a deep fry thermometer, or until a small piece of the dough or bread cube placed in the oil sizzles and browns in 1 minute. Have ready a tray or sheet pan lined with paper towels or paper bags.

5. Carefully lower a few of the cannoli tubes into the hot oil. Do not crowd the pan. Fry the shells until golden, about 2 minutes, turning them so that they brown evenly.


8. Lift a cannoli tube with a wire skimmer or large slotted spoon, out of the oil. Using tongs, grasp the cannoli tube at one end. Very carefully remove the cannoli tube with the open sides straight up and down so that the oil flows back into the pan. Place the tube on paper towels or bags to drain. Repeat with the remaining tubes. While they are still hot, grasp the tubes with a potholder and pull the cannoli shells off the tubes with a pair of tongs, or with your hand protected by an oven mitt or towel. Let the shells cool completely on the paper towels. Place shells on cooling rack until ready to fill

9. Repeat making and frying the shells with the remaining dough. If you are reusing the cannoli tubes, let them cool before wrapping them in the dough.


ASSEMBLE THE CANNOLI:
1. When ready to serve..fill a pastry bag fitted with a 1/2-inch plain or star tip, or a ziplock bag, with the ricotta cream. If using a ziplock bag, cut about 1/2 inch off one corner. Insert the tip in the cannoli shell and squeeze gently until the shell is half filled. Turn the shell and fill the other side. You can also use a teaspoon to do this, although it’s messier and will take longer.


2. Press or dip cannoli in chopped pistachios, grated chocolate/mini chocolate chips, candied fruit or zest into the cream at each end. Dust with confectioner’s sugar and/or drizzles of melted chocolate if desired.


We decided to make our own marscarpone cheese for this recipe. Unfortunately, I don't have any photos, but in the end it turned out great. We followed the recipe from Baking Obsession (http://www.bakingobsession.com/2009/05/02/homemade-mascarpone-cheese/). We had trouble getting the cream mixture to the correct heat, but once we did everything came together very well! We stored it in the refrigerator overnight, and it was the perfect consistency when we pulled it out to make the filling the next day.
 
We made the filling for the cannoli, and it ended up very runny. My dad assembled it so I'm not sure what exactly made it so runny. We tried to adjust the ingredients to make it come together, but nothing seemed to work. We even placed it over cheesecloth for the night to try and drain some of the liquid, but even that did not help much. It still tasted delicious, but it was just runny.


The dough on the other hand came out perfectly! It was just the right consistency, and was springy just as it was suppose to be. It rolled out very well.


My husband likes to do workworking, and he had a left over dowel in the shed. He cut it down to three 7-8 inch pieces, and we oiled it down very well. They worked perfectly for our cannoli forms.


Since we live in on post military housing, we don't have the convenience of having a really good quality oven/stove. It is difficult to keep oil evenly heated, and it often shoots up in temperature without warming. This was my biggest concern when it came to making the cannoli shells. Fortunately, we didn't have too many problems, but I am sure a better stove would have yielded better results when it came to the shells cooking evenly.

For the first batch, I did not secure the flaps well enough with the egg white so several of them puffed apart. I also think in hindsight that our shells could have been thinner.


After all of the cannoli shells were done it was time for filling! YUM!

We decided to stick with the basic filling with mini chocolate chips and pistachio pieces.


Overall, I was once again very happy with this challenge. Considering we're not professional bakers, and we're in this to learn, we had a great time. I would definitely make these again for a special occassion!

My dad and I are both looking forward to the December challenge as we will be together for the holidays and we will complete the challenge together then!
See you again in December! :)

Saturday, October 31, 2009

Tuesday, October 27, 2009

Daring Bakers Challenge October 2009 - French Macarons

This was my first month as a part of the Daring Bakers, and my first time definitely proved to be a challenge! This month's recipe was brought to us by Ami S. She chose macarons from Claudia Fleming’s The Last Course: The Desserts of Gramercy Tavern as the challenge recipe.


French macarons are a far cry from what most Americans think of when they picture a gooey, coconut concoction with a slightly browned top. French macarons on the other hand are made with ground almond flour, egg whites, and two types of sugar. That's it! Surprisingly, those five ingredients proved to be far more intense than I realized they could be.
 
Here are the directions as listed on the Daring Bakers website:
 
Note: Macaron making is somewhat labor intensive, yet simultaneously less difficult than you think it will be. One thing you must do is have your egg whites at room temperature. This ensures they beat up properly, as texture is an integral component to macarons. You will be piping the batter onto parchment paper or nonstick liners, and some home bakers use stencils to make sure their macarons are uniform in size. It’s your choice.


Be aware that you are beating your egg whites first to soft peaks. Soft peaks means that the peaks of the meringue curl over when you lift up the beaters. After you add the granulated sugar to the soft peak meringue, you will beat the mixture to stiff peaks, which, true to their name, stand straight up. Be careful not to overbeat your eggs.

You will also be folding the nut flour into the meringue. As with most recipes when you combine something with beaten egg whites, be gentle in your mixing to keep the egg whites light.


Some recipes call for drying the piped macarons on the counter prior to baking for 30 minutes to an hour. This recipe stipulates that you bake the macarons at a low temperature for 5 minutes, then take them out of the oven, raising the temperature, and baking them for an additional 7 to 8 minutes. Drying is necessary to get the trademark “feet” on your macarons. Experiment to find the best technique for you.

If you plan on using parchment paper rather than nonstick pan liners, be careful when removing the macarons from the paper, as they can stick and are very delicate. Some recipes suggest lifting up a corner of the paper and letting a drop of water fall onto the hot baking sheet, thus producing steam, which helps the macarons release.


Preparation time: Not taking into account the amount of time it takes for you to bring your egg whites to room temperature, the whole baking process, including making the batter, piping and baking will probably take you about an hour to an hour and a half. How long it takes to make your filling is dependent on what you choose to make.


Actual baking time: 12 minutes total, plus a few minutes to get your oven from 200°F to 375°F.

Equipment required:
• Electric mixer, preferably a stand mixer with a whisk attachment
• Rubber spatula
• Baking sheets
• Parchment paper or nonstick liners
• Pastry bag (can be disposable)
• Plain half-inch pastry bag tip
• Sifter or sieve
• If you don’t have a pastry bag and/or tips, you can use a Ziploc bag with the corner snipped off
• Oven
• Cooling rack
• Thin-bladed spatula for removing the macaroons from the baking sheets
• Food processor or nut grinder, if grinding your own nuts (ouch!)


Ingredients
Confectioners’ (Icing) sugar: 2 ¼ cups (225 g, 8 oz.)

Almond flour: 2 cups (190 g, 6.7 oz.)


Granulated sugar: 2 tablespoons (25 g , .88 oz.)


Egg whites: 5 (Have at room temperature)


Directions:
1. Preheat the oven to 200°F (93°C). Combine the confectioners’ sugar and almond flour in a medium bowl. If grinding your own nuts, combine nuts and a cup of confectioners’ sugar in the bowl of a food processor and grind until nuts are very fine and powdery.


2. Beat the egg whites in the clean dry bowl of a stand mixer until they hold soft peaks. Slowly add the granulated sugar and beat until the mixture holds stiff peaks.

3. Sift a third of the almond flour mixture into the meringue and fold gently to combine. If you are planning on adding zest or other flavorings to the batter, now is the time. Sift in the remaining almond flour in two batches. Be gentle! Don’t overfold, but fully incorporate your ingredients.


4. Spoon the mixture into a pastry bag fitted with a plain half-inch tip (Ateco #806). You can also use a Ziploc bag with a corner cut off. It’s easiest to fill your bag if you stand it up in a tall glass and fold the top down before spooning in the batter.


5. Pipe one-inch-sized (2.5 cm) mounds of batter onto baking sheets lined with nonstick liners (or parchment paper).


6. Bake the macaron for 5 minutes. Remove the pan from the oven and raise the temperature to 375°F (190°C). Once the oven is up to temperature, put the pans back in the oven and bake for an additional 7 to 8 minutes, or lightly colored.

7. Cool on a rack before filling.

Before I started baking, I read page, after page, after page of comments, photos, and tips from other Daring Bakers. I was determined to fully understand the challenges others faced and know how to correct problems before I dove in. (I have a terrible habit of just diving into a recipe without reading it carefully!)

I made sure to have all of my ingredients and kitchen items at the ready so I wouldn't waste any time. I aged my egg whites overnight, and let them come to room temperature for almost a full day. At last, I had the house to myself, the pup was napping, and it was time to get baking!

I carefully watched as my egg whites came to what I thought was a near perfect consistency. I then carefully folded my ingredients together until I thought they were ready to pipe onto the baking sheets. It was now time for the true test, would the feet form?!?!

After reading others' posts, I knew getting 'feet' on my macarons was going to be the biggest challenge. Many of the bakers who were far more experienced than me, did not have any feet at all on the macarons. I did pick up a few pointers from other bakers in my reading so I made sure to lay out parchment paper to bake the macarons on, and I also stacked two baking sheets to help the feet form and cook evenly.

At last, they were ready for the oven:


For the first batch, I followed the directions exactly. Several minutes before the end, I was literally jumping up and down because....
THEY HAD FEET!!!!!!!
In nothing else went right, I was thrilled my macarons had feet! I knew this was a huge challenge for other which I overcame without any problem. When they first batch was done, they came out like this:


All in all, I was pretty happy with how they turned out. They didn't puff up as much as I would have liked, but I couldn't complain because at least they looked like macarons!

I baked another batch in which I upped the oven temperatures to see how it would change my results. Many of the other bakers thought the temps were too low so I wanted to see what my results would be. I also left them in a touch longer. The results:


I thought baking them at a higher temp for a bit longer really did make a difference. They weren't as chewy as the first batch and the shell was a bit crunchy.

I wanted to do a bit more experimenting, but time did not allow with this recipe! I chose to just bake plain macarons and fill them with chocolate ganache.


Overall , I was quite pleased with how my macarons turned out. I would like to try them again because my husband and I thought they were delicious. I was shoked how many variations there are of macarons when I began searching online. So many macarons, so little time....