This month, the Daring Bakers were tasked with making Gingerbread Houses. When I was very young, my mom used to making very extravagent gingerbread houses with her 5th grade students and then enter them into a local contest. I figured if she did it so well, it must be in the blood! I was really looking forward to this challenge as it offered a creative outlet during this super busy and hectic time of year.
I decided that I would make a fancy gingerbread house here at home with my husband's help, and then we would make a more lighthearted and fun one with my parents back home in Michigan. After reading many of the comments on the DB board, I decided to go with the Good Housekeeping recipe for my dough and the Royal Icing Recipe from the DB:
Royal Icing
1 large egg white
3 cups (330g) powdered sugar
1 teaspoon white vinegar
1 teaspoon almond extract
Beat all ingredients until smooth, adding the powdered sugar gradually to get the desired consistency. Pipe on pieces and allow to dry before assembling. If you aren't using it all at once you can keep it in a small bowl, loosely covered with a damp towel for a few hours until ready to use. You may have to beat it slightly to get it an even consistency if the top sets up a bit. Piped on the house, this will set up hard over time.
Since I wanted to make a traditional house for the first try, we chose the Colonial from Bob Vila's website. The template can be found here: http://www.bobvila.com/Downloads/Gingerbread_Colonial.pdf
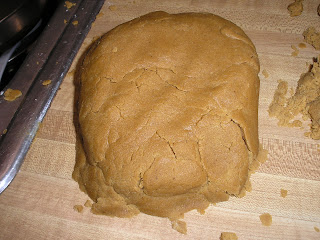
I made the dough a few days in advance when I had a bit of time, and I found it to be rather dry.
Thankfully, when I rolled the dough out several days later, I didn't have many problems once the dough softened slightly.
Unfortunately, my oven does not cook evenly at all, and I had some trouble baking the pieces to the color and doneness I wanted. (Thankfully, Santa brought me an oven thermometer so now I can monitor it better!)
It was rather tedious cutting out all of the windows, but in the end I think it was totally worth it! In hindsight, I now know that I can trim the pieces when they first come out of the oven. This would have saved us some headache when we were putting the pieces together.
I decided that I did not want empty windows so I made some hard candy. I had some trouble with it as I think the butter in the candy may have browned. Instead of clear windows they were more opaque, but in the end I love the way the windows turned out!
I don't have any photos of the frosting before I applied it to the house, but our first batch was more like playdough than frosting. I think it had something to do with the fact that it was a rainy day, but it actually worked very well to put the wall up with. We also decorated the 4 walls before putting them up as it was much easier this way!
We waited 24 hours before putting the roof on, and this is where we ran into a slight problem. My second batch of frosting was much softer and more like it should have been. Our roof was also not perfectly square so we had a tough time getting it to stay on. We were able to rest the corners on the walls, and it worked out just fine in the end.
And the finished product......
When we went back to Michigan for Christmas, we made another 'house' with my parents. My dad used the same recipes as above, but this time we made a gingerbread trailer. We were inspired by the designs here: http://www.theeayc.com/gallery/ginger/index.html. Fabulous!
My husband free handed the template with a pencil and a ruler, but unfortunately, I don't have any photos of his pattern. Overall, I think this came out pretty awesome!
We cut up one of our family's Christmas cards to put in the window, and we also had to put a photo of our 'favorite' person Sarah Palin in the window too! ;)


