Wednesday, August 11, 2010

Crazy, Syrian Woman


So, as you may or may not know, I am half Syrian on my mom's side. Thankfully, as I grew up, I was often in the kitchen with my mom and also with my Tete (Grandma) until she passed away. I was able to learn so much from them about making Syrian food and also about family traditions. I am so grateful for this time spent with both of them. Although I don't know everything there is to know about Syrian cooking, I've gleaned as much as I can from these experiences, and as my mom will tell you, I call her all the time for help and tips when I try traditional recipes.

Recently, in the wonderful world of food blogging, I came across my sister from another mister, Dimah. No, she doesn't have a clue who I am, but I think she is pretty much the greatest person....ever. She blogs over at Orange Blossom Water, and she is Syrian. She lives in Syria, and she blogs almost entirely about Syrian cooking/baking. She, like me, learned from her mother, and she shares as much as she can about what she learns. I pretty much am in love with her. (That's not at all creepy, right.....?)


Like every good, Syrian woman, I have a trusty bottle of Orange Blossom Water handy at all times!

While browsing her blog, I came across a killer recipe for Bsaisat which is a Syrian dessert made by working and rolling out dough and then flattening it out before frying it and dunking it in sugar syrup. A-M-A-Z-I-N-G! I knew I just had to try this recipe. The funny thing is, once I told my mom about the recipe, she told me my tete used to make them with my aunt long before I was born. I really feel such a strong connection to my tete, and I think it's so ironic when I have a link to her I never even knew about or could have predicted.

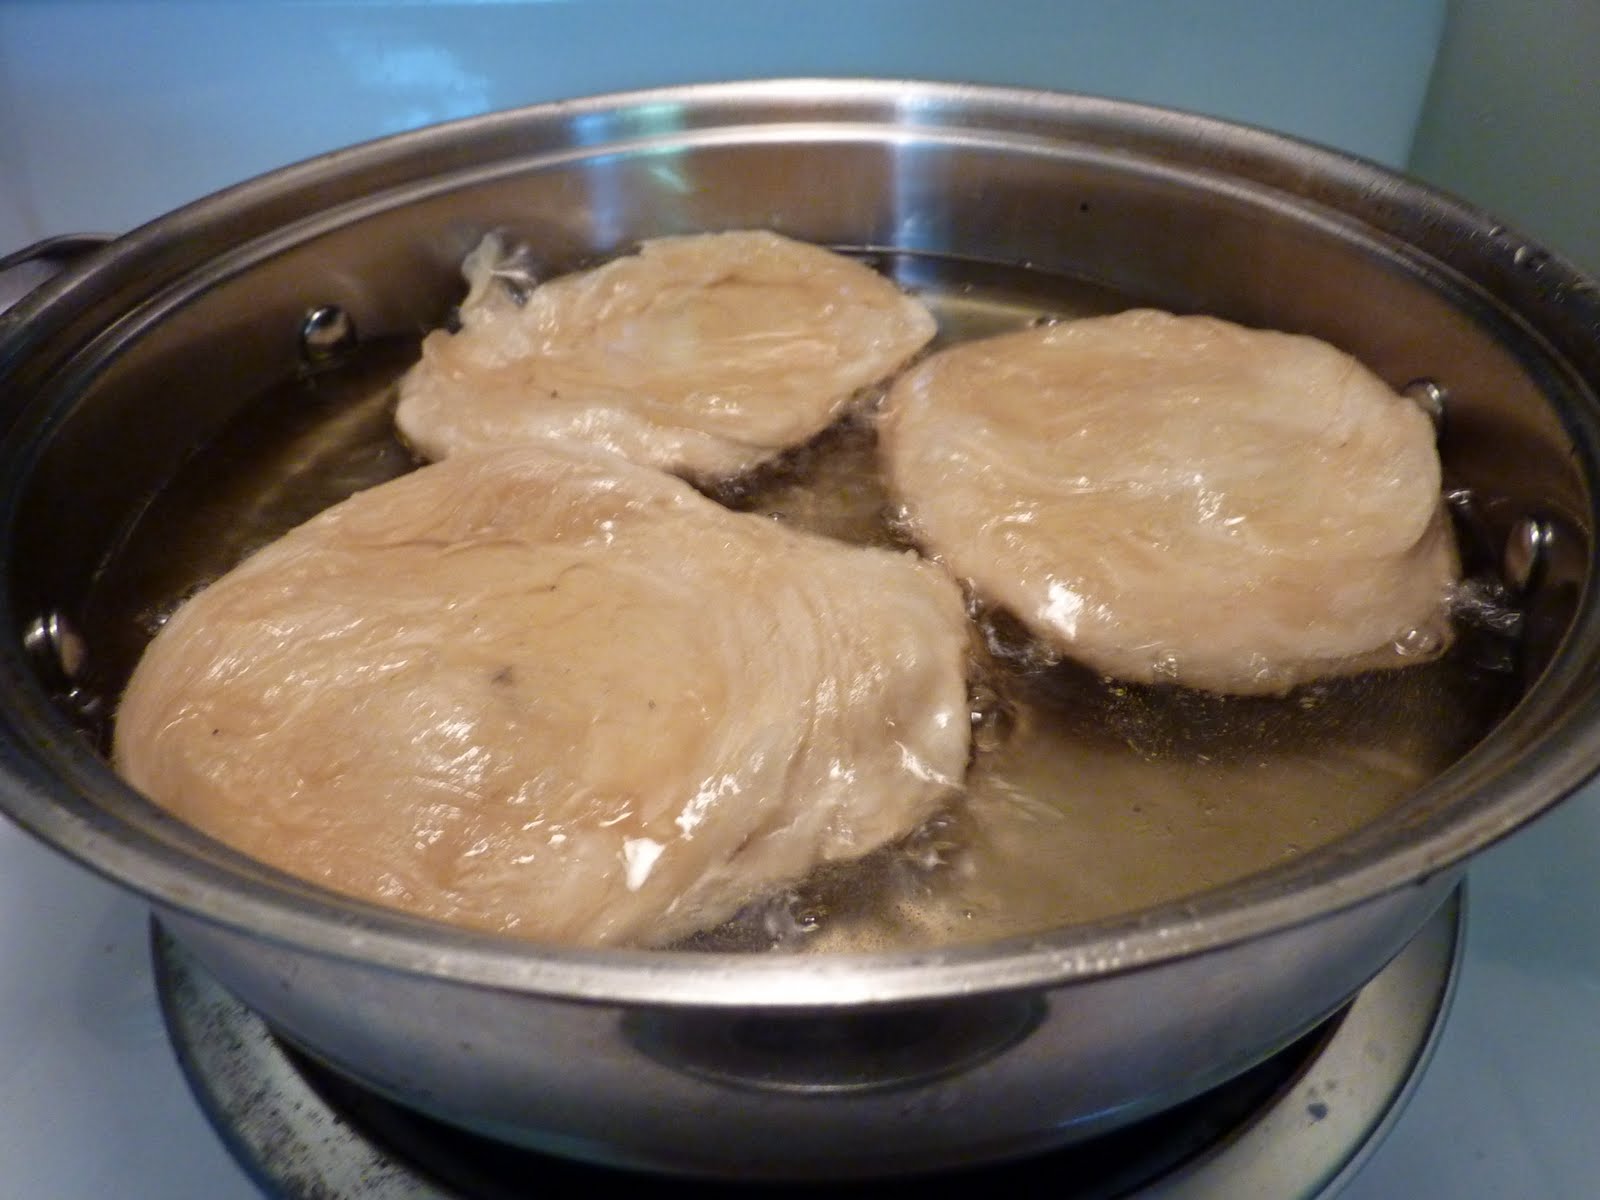
I knew this recipe would take most of the day, but I had all of the ingredients so I thought I would give it a try. I first had to start with A'Jineh Mwarraqah, the dough, and then finishing with the frying and soaking. Since most of the recipe references photos taken by Dimah, I won't copy and paste it here, but you can see the full recipe in the link above. I will just post some photos of my process here.


A few notes after the fact:
- Next time, I will make the dough balls a bit smaller
- I'm not sure how Dimah got so many fluffy looking layers in hers. I even decided to use my hands versus the rolling pin for the final role out in hopes of keeping some of the fluff
- When I fried the second batch, I noticed the lower temperature seemed to bring out a few more layers

I will definitely make these again! Although the dough took a bit of time, it was very simple to make, and the end result was delicious!

Tuesday, August 10, 2010

Peanut Butter-Chocolate Pancakes and a Guinness Night!

We wrapped up the weekend by just vegging out at home on Sunday until I headed out to the USO to volunteer for the afternoon. Andrew knows I have a strange urge to try every pancakes recipe I can find. Even when I find one I love, I always feel the need to try another. I think it's because at their basic ingredients, pancakes are super simple, but there is so much you can do with them! Since Andrew and I both love peanut butter and chocolate I thought I would try a recipe I found for Peanut Butter-Chocolate Swirl Pancakes I found on Foodgawker and adapted a bit. I loved the swirl in the pancakes!

Peanut Butter-Chocolate Swirl Pancakes

Chocolate Batter
1/4 cup unbleached all purpose flour
1/2 cup whole wheat flour
1/4 cup cocoa powder
1 teaspoon baking powder
1/2 teaspoon baking soda
3/4 cup milk
1 egg
1 tablespoon butter melted

Peanut Butter Batter
1/2 cup unbleached all purposed flour
1/2 cup whole wheat flour
1 teaspoon baking powder
1/2 teaspoon baking soda
3/4 cup milk
1 egg
1 tablespoon melted butter
2 tablespoons natural smooth peanut butter

Banana Topping
2 ripe bananas
1/4 cup milk
1 tablespoon maple syrup

Directions
In a medium bowl, combine all the dry ingredients for chocolate batter. Stir in milk, egg, and melted butter until batter comes together. If batter is still a little thick (should be easily pourable) add in a little more milk. Set aside and repeat with peanut butter batter in a separate bowl.

Heat a skillet over medium heat. Scoop about a fourth of the chocolate batter and smooth out to a circle. Take the peanut butter batter and drizzle two lines across the chocolate pancake. With a knife, swirl the peanut butter into the chocolate part of the pancake. Continue, reversing every other pancake (so you will also have peanut butter pancakes with a chocolate swirl.) Cook on one side until little bubbles form on the surface. Flip the pancake and continue to cook until pancake is done.

If you are making a lot of pancakes, turn your oven on to 200˚ to keep pancakes warm until you are ready to serve.

To make banana topping, combine the three ingredients in a bowl and mash with a fork until banana is slightly chunky.
 

Since Andrew is a diehard Guinness lover, I thought I would do a Guinness themed dinner for him since he's been under a lot of stress lately with his Army classes and Masters classes going simultaneously.

I started by making the custard base for Guinness-Malt Ice Cream which I sadly don't have a photo of. Although in the end this ice cream was delicious, it would NOT come together in the ice cream maker. It ran for well over an hour without even getting a yogurt like consistency. I finally just poped it in the freezer in a plastic container and it came together well. Andrew said it was great!


I also made Guinness Battered Onion Rings which were KILLER!
 
Guinness Battered Onion Rings

3 onions sliced in 1/2 inch slices
About 1 1/2 cups milk
1 1/2 cups flour
12 ounces Guinness Extra Stout beer
1 extra large egg, separated
1 teaspoon salt
4 cups canola oil

Put the onion slices in a medium bowl and pour the milk over them. (I had some leftover Guinness from the ice cream so I dumped this in as well. I honestly, don't think it made a difference.) Let them sit about an hour (I let them sit for the afternoon), tossing occasionally. In another medium bowl, mix the Guinness into the flour while stirring. Stir in the egg yolk and salt. Let sit for about one hour. Just before deep frying, beat the egg whites until stiff. Gently fold the egg white into the beer batter. ( I really think the egg white made all the difference!)
Over medium high heat, heat the oil in a medium size pot or deep fryer to 350 degrees. Line a baking sheet with several layers of paper towels. Drain the milk from the onions and put them into the batter. Carefully drop onion slices in the hot oil, one at a time without overcrowding. Add only as many as you can so they do not overlap. You'll need to make several batches, but since they cook so quickly it will go fast. Using 2 forks or tongs, turn the onions when they are brown on one side. Remove from the oil when both sides are a golden brown and put on the paper towel lined baking sheet. They brown within a few minutes, so keep an eye on them. Keep frying the onion slices until all are fried.

Sprinkle with salt and serve hot.

The main event were the Guinness Burgers which I personally thought were a bit disappointing. Andrew thought they were good, but I didn't think they were anything special.


Guinness Burgers

Ingredients:
1 pound locally raised, grass fed ground beef
2/3 cup Guinness Stout
1 red onion, finely diced
4 bacon slices, finely diced
1 teaspoon creamed horseradish
1 large egg, beaten
1/2 teaspoon paprika
2 heaping tablespoons all-purpose flour

1.The night before you want to make these, lay the ground beef out is a shallow dish and cover with the Guinness. Using your hands, massage the Guinness into the meat, cover with plastic wrap and let marinate in the fridge for at least 12 hours. ( I only refrigerated it for about 8 hours.)

2.When ready to form the burgers, saute the onion and bacon in a skillet until the onion is lightly browned and the bacon is crisped to your liking. Pour the mix into a fine mesh seive to drain away any excess bacon fat and set aside to cool.

3.Lift the beef out of the marinade and gently squeeze any excess Guinness from the meat. Place the meat in a large bowl, add the onion bacon mixture, the horseradish, egg and paprika. Season with salt and pepper and sprinkle the flour over. Using your hands, mix together well. Divide the mix into 4 equal portions and form into round patties, about 1 1/2 inches thick. Carefully lay the patties on a non-stick baking sheet and top with plastic film. Refrigerate for at least 1 hour, and up to 6 hours to firm up.

5.When ready to cook the burgers, lightly oil a cast iron (or non-stick) frying pan. Heat over a medium-high flame until just beginning to smoke, add the burgers and cook for a bout 5 minutes on each side, until well browned on the outside. Because the Guinness stains the meat, a medium-rare burger will not be rosy pink inside, so you will need to go by feel to know when they are done. The burgers should resist slightly in the center (and not be too mushy), when cooked to medium rare.

We served these just like regular burgers on a bun with all the condiments. I really felt that the horseradish was overpowering, and I couldn't really taste the Guinness.

Saturday, August 7, 2010

Stone Mill Spring and Lots-o-Chicken


Today, we spent the afternoon at the Stone Mill Spring where it meets with the Big Piney River. We had a lovely time with a group of friends just relaxing and sitting in the water. I'm so thankful to have good friends here who make a crappy post a bit more bearable!


Since we were spending the afternoon at the spring, I wanted to bring a picnic so we weren't just eating junk all day. I made a from Rachel Ray for Chicken Salad with Yogurt-Ranch Dressing, and it was great! Fortunately, I had tomatoes and cucumber from the garden, and I got a lovely pepper at Farmers Market. Sorry, no photos as we were in a rush to get out the door. The recipe made a great amount so I was able to feed a few of the other guys who were with us.

For dinner, to make things easier, I whipped out my trusty crockpot. I haven't been using it much lately, but I really want to start using it more often. I feel that so many times crockpot recipes don't have much flavor or everything ends up a big pile of mush when it's done. My friend Alexis passed on a recipe for Chicken Tagine with Couscous in the crockpot so I thought I would give it a try. It was delicious, and Andrew loved it! It made plently for us to have for lunch tomorrow as well! Although it may not be the prettiest thing I have ever made, I will definitely keep it on reserve to make again in the future!

P.S. If anyone has any good crockpot recipes they'd like to share, please pass them along!

Friday, August 6, 2010

A few of my favorite recipes...

One of my goals when we moved to Missouri was to be better at updating my food blog. I always take photos of what I make, but they never make it anywhere but in my computer files. So....here's to being a better blogger! I thought I would post some of my favorite recipes (that I have photos to go along with) to share with everyone!

Chicken and Cheddar Chowder


Junior League of Grand Rapids Cookbook
Serves: 6
Ingredients:
• 1 cup chicken stock
• 1 cup water
• 2 small unpeeled russet potatoes, finely chopped
• ½ cup finely chopped carrots (I used closer to 1 cup)
• ½ cup finely chopped celery (I used closer to 1 cup)
• ¼ cup chopped shallots
• 1 tablespoon salt
• ½ teaspoon finely ground pepper
• 1 cup fresh corn (I used frozen)
• ¼ cup (1/2 stick) butter
• ¼ cup flour
• 2 cups milk
• 1 cup (4 ounces) shredded sharp Cheddar cheese
• 1 cup (4 ounces) shredded white Cheddar cheese (I used all sharp Cheddar)
• 2 boneless, skinless chicken breasts, cooked and shredded
• 2 green onions, thinly sliced
• 2 slices bacon, crisp-cooked and crumbled
• Shredded cheese

Directions:

Bring the chicken stock and water to a boil in a large stockpot. Add the potatoes, carrots, celery, shallots, salt and pepper and boil, covered for 10 to 12 minutes, stirring occasionally. Remove from the heat. Stir in the corn and let stand, covered.

Melt the butter in a medium saucepan. Whisk in the flour until of a smooth paste consistency. Add the milk, gradually, stirring constantly. Cook over medium-high heat for 5 minutes or until thickened, stirring constantly.

Remove from the heat and add the cheeses, stirring until melted. Add the cheese sauce to the corn mixture. Add the chicken and mix well. Cook over medium heat until very warm. Do not boil. Ladle into soup bowls and top with the green onions, bacon, and additional shredded cheese.


Blood Orange Cupcakes with Blood Orange Frosting

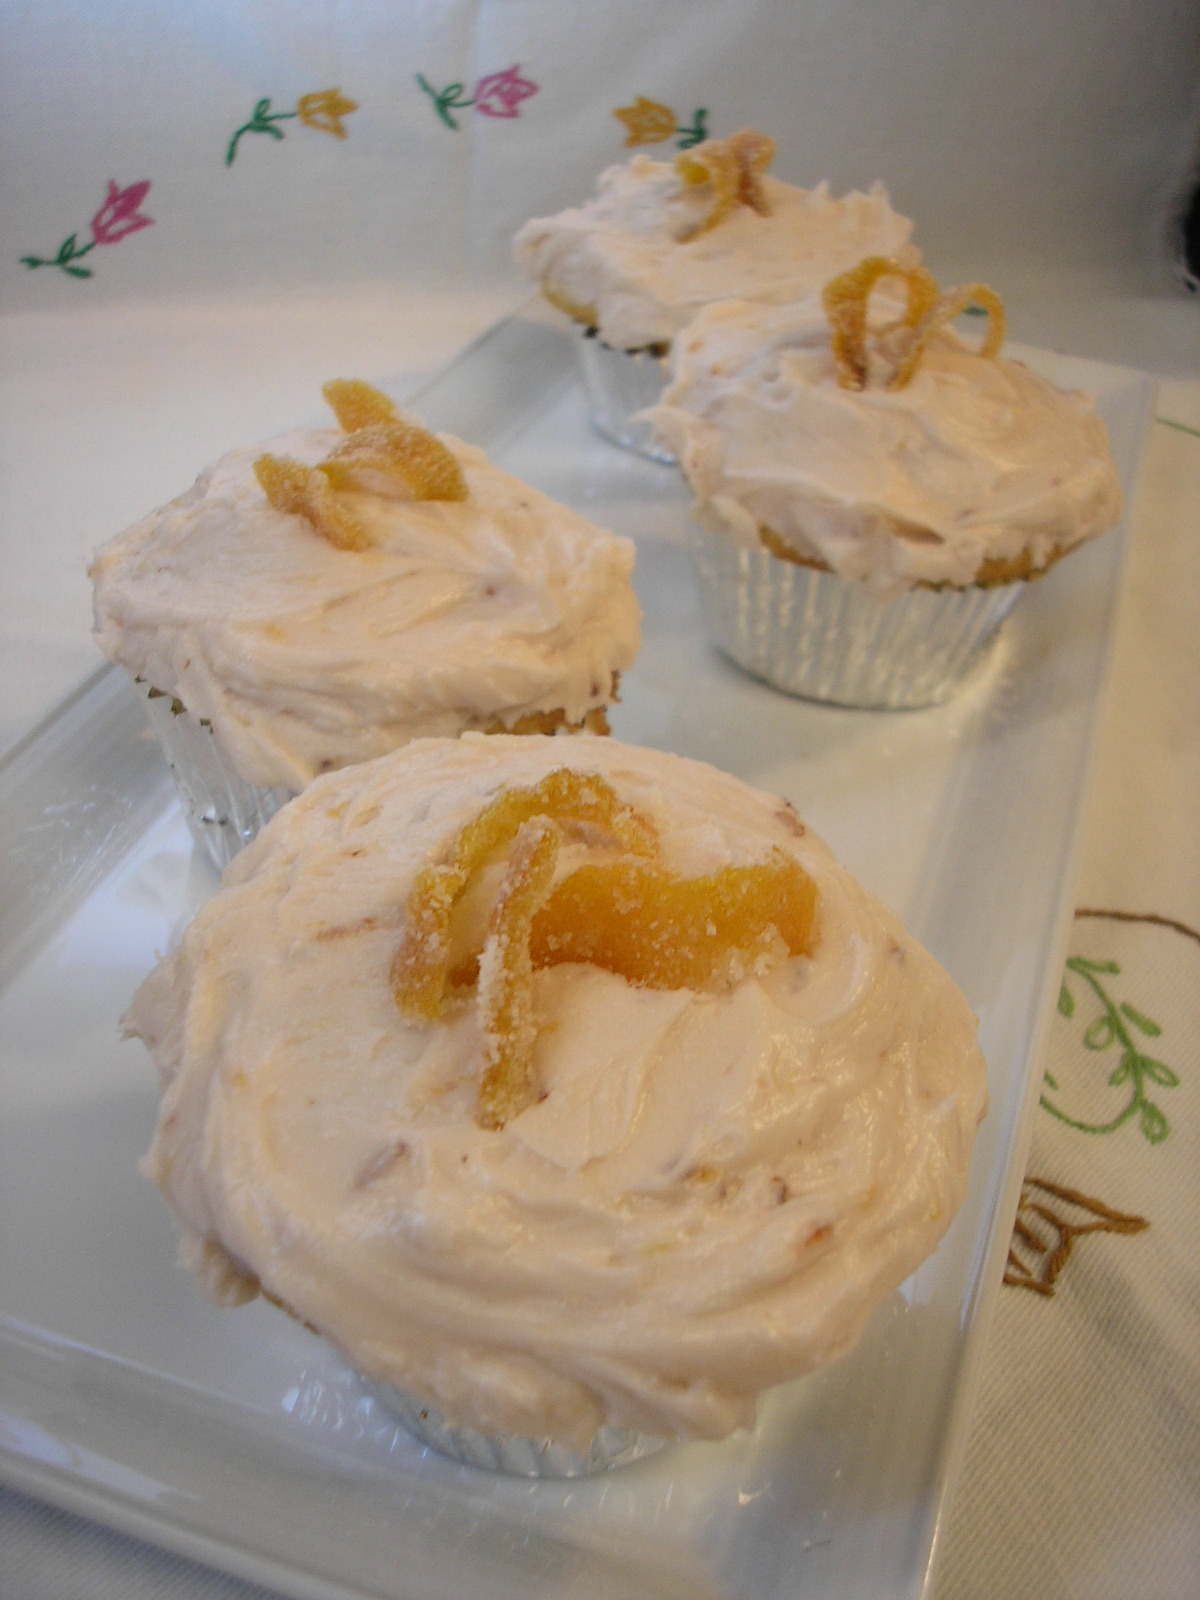
These cupcakes are to die for! I can't get enough of them when I have them in the house. I used the cupcakes recipe freom Chez Us here and Magnolia Bakery's butter cream frosting here. I just substituted the blood orange juice for some of the milk and zested the blood orange into the frosting.

Triple Sec Fruit Salad

My mother is very fond of this recipe, and I often re-create it here at home. I have no idea where she got the idea, but it's super simple!

Ingredients:
4 oranges (and/or blood oranges if you can find them!)
2 grapefruit
1 starfruit
4 kiwi
1/4 cup triple sec
2T sugar

1. Segment the oranges and grapefruits like this and place in a medium size bowl. Squeeze out any remaining juice from the flesh of the fruit before throwing it away. Skin the kiwi and slice adding to the bowl. Slice the starfruit and add it to the bowl as well. Sprinkle the sugar over the fruit and then add the triple sec. Stir and serve. Can also be refrigerated overnight. This only increases the flavors!


I like to make this when we have company staying with us because I can make it the night before and just pop it in the oven in the morning!

Panko-Crusted Eggplant Parmesan (Courtesy of Put a Lyd on it)
I found this recipe while flipping through an issue of Family Circle. I was really worried it wouldn't have much flavor, but it's wonderful!


Grilled Tilapia with Pineapple Salsa
I recently purchased a copy of Pampered Chef's 29 Minutes to Dinner and I was surprised how many great recipes it had in it. This is one we've made a few times!


Serves 4
Ingredients:

Pineapple Salsa
• 1/2 medium pineapple
• 1/4 small red onion
• 1 serrano pepper
• 2 Tbsp chopped fresh cilantro
• 1/8 tsp salt
• 1 lime

 Tilapia
• 1 packet taco seasoning (1.25 oz) (I like the low sodium version or sometimes I make my own)
• 3 Tbsp Garlic Oil or olive oil
• 4 boneless skinless tilapia fillets (about 4 oz each)

1. Heat Grill Pan over medium heat 5 minutes. As pan heats, using Santuko Knife, peel pineapple half; cut lengthwise into two pieces and remove core. Slice each pineapple piece lengthwise into three strips. Arrange strips in a single layer over Grill Pan; cook 2-3 minutes on each side or until grill marks appear. Set aside on Cutting Board.

2. While pineapple cooks, chop onion. Cut serano pepper lengthwise in half; remove and discard seeds. Chop serrano pepper and cilantri. Combine onion, serrano peppers, cilantro and salt in Small Batter Bowl. Zest lime using Microplane Adjustable Grater to measure 1 tsp zest. Juice lime to measure 1 Tbsp juice. Add zest and juice to batter bowl; mix well.

3. Whisk taco seasoning and oil in Stainless Mixing Bowl. Add tilapia to coat. Place two tilapia fillets onto Grill Pan. Cook 2 minutes or until grill marks appear. Turn tilapia over using Jumbo Slotted Turner; cook 2 minutes or until tilapia flakes easily with a fork. Remove tilapia from pan. Wipe out pan and repeat with remaining fillets.

4. As tilapia cooks, chop pineapple and add to onion mixture in batter bowl; mix well. To serve, top tilapia with pineapple salsa.

I have been getting Martha Stewart's Every Day Food Magazine for many years now, and I love it. She has so many easy, flavorful recipes! This is one we love to make when the corn shows up in the summer!

Enjoy!

Thursday, May 27, 2010

April Daring Bakers Challenge - Piece Montee

This month's Daring Bakers provided a challenge I have always wanted to try...croquembouche! I knew it would be a challenge not only for obvious reasons, but also because we recently moved to our new home in Missouri, and thank you US Army, we have a dreaded electric stove. Thankfully, with my trusty oven thermometer by my side, we pushed through and had another successful challenge!


The May 2010 Daring Bakers’ challenge was hosted by Cat of Little Miss Cupcake. Cat challenged everyone to make a piece montée, or croquembouche, based on recipes from Peter Kump’s Baking School in Manhattan and Nick Malgieri.

I wanted to be as true to the traditional croquembouche as possible so I made traditional cream puffs with almond pastry cream. I also did not use a cone or other structure for support. I assembled it traditionally with a hard caramel glaze. Although it leaned slightly, I was very happy with how everything turned out!

For the Vanilla Crème Patissiere (Half Batch)


1 cup (225 ml.) whole milk
2 Tbsp. cornstarch
6 Tbsp. (100 g.) sugar
1 large egg
2 large egg yolks
2 Tbsp. (30 g.) unsalted butter
1 Tsp. Vanilla

Dissolve cornstarch in ¼ cup of milk. Combine the remaining milk with the sugar in a saucepan; bring to boil; remove from heat.
Beat the whole egg, then the yolks into the cornstarch mixture. Pour 1/3 of boiling milk into the egg mixture, whisking constantly so that the eggs do not begin to cook.
Return the remaining milk to boil. Pour in the hot egg mixture in a stream, continuing whisking.
Continue whisking (this is important – you do not want the eggs to solidify/cook) until the cream thickens and comes to a boil. Remove from heat and beat in the butter and vanilla.
Chill at least 6 hours or overnight.


Pate a Choux (Yield: About 28)


¾ cup (175 ml.) water
6 Tbsp. (85 g.) unsalted butter
¼ Tsp. salt
1 Tbsp. sugar
1 cup (125 g.) all-purpose flour
4 large eggs
For Egg Wash: 1 egg and pinch of salt

Pre-heat oven to 425◦F/220◦C degrees. Line two baking sheets with parchment paper.
Preparing batter:
Combine water, butter, salt and sugar in a saucepan over medium heat. Bring to a boil and stir occasionally. At boil, remove from heat and sift in the flour, stirring to combine completely.
Return to heat and cook, stirring constantly until the batter dries slightly and begins to pull away from the sides of the pan.
Transfer to a bowl and stir with a wooden spoon 1 minute to cool slightly.


Add 1 egg. The batter will appear loose and shiny.
As you stir, the batter will become dry-looking like lightly buttered mashed potatoes.

It is at this point that you will add in the next egg. Repeat until you have incorporated all the eggs.


Piping:
Transfer batter to a pastry bag fitted with a large open tip (I piped directly from the bag opening without a tip). Pipe choux about 1 inch-part in the baking sheets. Choux should be about 1 inch high about 1 inch wide.
Using a clean finger dipped in hot water, gently press down on any tips that have formed on the top of choux when piping. You want them to retain their ball shape, but be smoothly curved on top.
Brush tops with egg wash (1 egg lightly beaten with pinch of salt).


Baking:
Bake the choux at 425◦F/220◦C degrees until well-puffed and turning lightly golden in color, about 10 minutes.
Lower the temperature to 350◦F/180◦C degrees and continue baking until well-colored and dry, about 20 minutes more. Remove to a rack and cool.

Can be stored in a airtight box overnight.


Filling:
When you are ready to assemble your piece montée, using a plain pastry tip, pierce the bottom of each choux. Fill the choux with pastry cream using either the same tip or a star tip, and place on a paper-lined sheet. Choux can be refrigerated briefly at this point while you make your glaze.
Use one of these to top your choux and assemble your piece montée.
Hard Caramel Glaze:
1 cup (225 g.) sugar
½ teaspoon lemon juice

Combine sugar and lemon juice in a saucepan with a metal kitchen spoon stirring until the sugar resembles wet sand. Place on medium heat; heat without stirring until sugar starts to melt around the sides of the pan and the center begins to smoke. Begin to stir sugar. Continue heating, stirring occasionally until the sugar is a clear, amber color. Remove from heat immediately; place bottom of pan in ice water to stop the cooking. Use immediately.

Assembly of your Piece Montée:
You may want to lay out your unfilled, unglazed choux in a practice design to get a feel for how to assemble the final dessert. For example, if making a conical shape, trace a circle (no bigger than 8 inches) on a piece of parchment to use as a pattern. Then take some of the larger choux and assemble them in the circle for the bottom layer. Practice seeing which pieces fit together best.
Once you are ready to assemble your piece montée, dip the top of each choux in your glaze (careful it may be still hot!), and start assembling on your cake board/plate/sheet. Continue dipping and adding choux in levels using the glaze to hold them together as you build up.
When you have finished the design of your piece montée, you may drizzle with remaining glaze or use ribbons, sugar cookie cut-outs, almonds, flowers, etc. to decorate. Have fun and enjoy! Bon appétit!


Saturday, February 27, 2010

February Daring Bakers - Tiramisu

This month, the Daring Bakers went with the theme Heaven on a Dessert Plate - Tiramisu.

The challenge:
On top of making/assembling our own tiramisu, we had to also make our own marscarpone cheese, lady fingers, zabaglione & vanilla pastry cream. It was a lot of work, but in the end, it was delicious!

The recipes and rules:
MANDATORY:

You MUST make your own savoiardi / ladyfinger biscuits and mascarpone cheese with the given recipes. You must also make the zabaglione and pastry cream using the given recipes.
If diet or health restrictions do not allow you to use these recipes, please go ahead and use one of the alternatives provided or other suitable recipes to make them, but please include links to the original recipe in your DB post.
Sponge cake may be not be used as a substitute. After all, a large part of this challenge is making those biscuits.


VARIATIONS:
Tiramisu is usually made in square dishes and cut into squares to serve. If you want to be different, please feel free to give full rein to your creativity as to how you want to present, decorate and serve your tiramisu. Make it square, round, as individual servings, or whatever! However, your version of Tiramisu must contain the mascarpone cheese and the savoiardi/ ladyfinger biscuits you made.


PREPARATION TIME:
Tiramisu is made up of several components which can be made separately and ahead of time and put together the day before serving.
Making tiramisu from scratch requires about 2 to 3 days (including refrigeration) from when you start making the mascarpone to the time the tiramisu is served. So this challenge requires some prior planning.
Please read the instructions as you need to begin making the mascarpone at least a day in advance. The zabaglione & pastry cream also need 4 hours to an overnight for chilling, as does the main dessert. The flavours mature after an overnight rest, and the dessert can be kept refrigerated for 2-3 days.
Once assembled, the tiramisu can be frozen till you need to serve it, in case you are not serving it immediately.


EQUIPMENT REQUIRED:
•A double boiler (a stainless steel bowl that fits inside a large saucepan/ pot without touching the bottom will do)
•Two or three large mixing bowls
•Whisk
•A medium sized heavy bottomed pan
•Fine meshed strainer (to remove lumps from pastry cream, if any)
•Electric mixer, hand held

•Serving dish (or dishes) of choice (8" by 8" should be fine)
•Spatula for folding and spoons as required
•Plastic wrap/ clingfilm
•Baking sheets
•Parchment paper or nonstick liners
•Pastry bag (can be disposable)
•Plain 3/4" pastry bag tip or cut the end of pastry bag to this size (If you don’t have a pastry bag and/or tips, you can use a Ziploc bag with the corner snipped off)
•Oven

•Cooling rack
•Thin-bladed spatula for removing ladyfinger biscuits from the baking sheets
•Instant-read thermometer (optional)
•Strainer
•Cheesecloth or cotton napkin for draining mascarpone
•Fine-mesh strainer for shaking cocoa powder on tiramisu

TIRAMISU
(Recipe source: Carminantonio's Tiramisu from The Washington Post, July 11 2007 )
This recipe makes 6 servings


Ingredients:
For the zabaglione:
2 large egg yolks
3 tablespoons sugar/50gms
1/4 cup/60ml Marsala wine (or port or coffee)
1/4 teaspoon/ 1.25ml vanilla extract
1/2 teaspoon finely grated lemon zest


For the vanilla pastry cream:
1/4 cup/55gms sugar
1 tablespoon/8gms all purpose flour
1/2 teaspoon finely grated lemon zest
1/2 teaspoon/ 2.5ml vanilla extract
1 large egg yolk
3/4 cup/175ml whole milk
For the whipped cream:
1 cup/235ml chilled heavy cream (we used 25%)
1/4 cup/55gms sugar
1/2 teaspoon/ 2.5ml vanilla extract


To assemble the tiramisu:
2 cups/470ml brewed espresso, warmed
1 teaspoon/5ml rum extract (optional)
1/2 cup/110gms sugar
1/3 cup/75gms mascarpone cheese
36 savoiardi/ ladyfinger biscuits (you may use less)
2 tablespoons/30gms unsweetened cocoa powder


Method:
For the zabaglione:
Heat water in a double boiler. If you don’t have a double boiler, place a pot with about an inch of water in it on the stove. Place a heat-proof bowl in the pot making sure the bottom does not touch the water.
In a large mixing bowl (or stainless steel mixing bowl), mix together the egg yolks, sugar, the Marsala (or espresso/ coffee), vanilla extract and lemon zest. Whisk together until the yolks are fully blended and the mixture looks smooth.
Transfer the mixture to the top of a double boiler or place your bowl over the pan/ pot with simmering water. Cook the egg mixture over low heat, stirring constantly, for about 8 minutes or until it resembles thick custard. It may bubble a bit as it reaches that consistency.
Let cool to room temperature and transfer the zabaglione to a bowl. Cover and refrigerate at least 4 hours or overnight, until thoroughly chilled.

For the pastry cream:
Mix together the sugar, flour, lemon zest and vanilla extract in a medium heavy-bottomed saucepan. To this add the egg yolk and half the milk. Whisk until smooth.
Now place the saucepan over low heat and cook, stirring constantly to prevent the mixture from curdling.
Add the remaining milk a little at a time, still stirring constantly. After about 12 minutes the mixture will be thick, free of lumps and beginning to bubble. (If you have a few lumps, don’t worry. You can push the cream through a fine-mesh strainer.)
Transfer the pastry cream to a bowl and cool to room temperature. Cover with plastic film and refrigerate at least 4 hours or overnight, until thoroughly chilled.

For the whipped cream:
Combine the cream, sugar and vanilla extract in a mixing bowl. Beat with an electric hand mixer or immersion blender until the mixture holds stiff peaks. Set aside.

To assemble the tiramisu:
Have ready a rectangular serving dish (about 8" by 8" should do) or one of your choice.
Mix together the warm espresso, rum extract and sugar in a shallow dish, whisking to mix well. Set aside to cool.
In a large bowl, beat the mascarpone cheese with a spoon to break down the lumps and make it smooth. This will make it easier to fold. Add the prepared and chilled zabaglione and pastry cream, blending until just combined. Gently fold in the whipped cream. Set this cream mixture aside.

Now to start assembling the tiramisu.
Workings quickly, dip 12 of the ladyfingers in the sweetened espresso, about 1 second per side. They should be moist but not soggy. Immediately transfer each ladyfinger to the platter, placing them side by side in a single row. You may break a lady finger into two, if necessary, to ensure the base of your dish is completely covered.
Spoon one-third of the cream mixture on top of the ladyfingers, then use a rubber spatula or spreading knife to cover the top evenly, all the way to the edges.
Repeat to create 2 more layers, using 12 ladyfingers and the cream mixture for each layer. Clean any spilled cream mixture; cover carefully with plastic wrap and refrigerate the tiramisu overnight.
To serve, carefully remove the plastic wrap and sprinkle the tiramisu with cocoa powder using a fine-mesh strainer or decorate as you please. Cut into individual portions and serve.

MASCARPONE CHEESE
(Source: Vera’s Recipe for Homemade Mascarpone Cheese)


This recipe makes 12oz/ 340gm of mascarpone cheese
Ingredients:
474ml (approx. 500ml)/ 2 cups whipping (36 %) pasteurized (not ultra-pasteurized), preferably organic cream (between 25% to 36% cream will do)
1 tablespoon fresh lemon juice


Method:
Bring 1 inch of water to a boil in a wide skillet. Reduce the heat to medium-low so the water is barely simmering. Pour the cream into a medium heat-resistant bowl, then place the bowl into the skillet. Heat the cream, stirring often, to 190 F. If you do not have a thermometer, wait until small bubbles keep trying to push up to the surface.
It will take about 15 minutes of delicate heating. Add the lemon juice and continue heating the mixture, stirring gently, until the cream curdles. Do not expect the same action as you see during ricotta cheese making. All that the whipping cream will do is become thicker, like a well-done crème anglaise. It will cover a back of your wooden spoon thickly. You will see just a few clear whey streaks when you stir. Remove the bowl from the water and let cool for about 20 minutes. Meanwhile, line a sieve with four layers of dampened cheesecloth and set it over a bowl. Transfer the mixture into the lined sieve. Do not squeeze the cheese in the cheesecloth or press on its surface (be patient, it will firm up after refrigeration time). Once cooled completely, cover with plastic wrap and refrigerate (in the sieve) overnight or up to 24 hours.
Vera’s notes: The first time I made mascarpone I had all doubts if it’d been cooked enough, because of its custard-like texture. Have no fear, it will firm up beautifully in the fridge, and will yet remain lusciously creamy.
Keep refrigerated and use within 3 to 4 days.


LADYFINGERS/ SAVOIARDI BISCUITS
(Source: Recipe from Cordon Bleu At Home)


This recipe makes approximately 24 big ladyfingers or 45 small (2 1/2" to 3" long) ladyfingers.
Ingredients:
3 eggs, separated
6 tablespoons /75gms granulated sugar

3/4 cup/95gms cake flour, sifted (or 3/4 cup all purpose flour + 2 tbsp corn starch)
6 tablespoons /50gms confectioner's sugar,

Method:
Preheat your oven to 350 F (175 C) degrees, then lightly brush 2 baking sheets with oil or softened butter and line with parchment paper.
Beat the egg whites using a hand held electric mixer until stiff peaks form. Gradually add granulate sugar and continue beating until the egg whites become stiff again, glossy and smooth.
In a small bowl, beat the egg yolks lightly with a fork and fold them into the meringue, using a wooden spoon. Sift the flour over this mixture and fold gently until just mixed. It is important to fold very gently and not overdo the folding. Otherwise the batter would deflate and lose volume resulting in ladyfingers which are flat and not spongy.
Fit a pastry bag with a plain tip (or just snip the end off; you could also use a Ziploc bag) and fill with the batter. Pipe the batter into 5" long and 3/4" wide strips leaving about 1" space in between the strips.
Sprinkle half the confectioner's sugar over the ladyfingers and wait for 5 minutes. The sugar will pearl or look wet and glisten. Now sprinkle the remaining sugar. This helps to give the ladyfingers their characteristic crispness.
Hold the parchment paper in place with your thumb and lift one side of the baking sheet and gently tap it on the work surface to remove excess sprinkled sugar.
Bake the ladyfingers for 10 minutes, then rotate the sheets and bake for another 5 minutes or so until the puff up, turn lightly golden brown and are still soft.
Allow them to cool slightly on the sheets for about 5 minutes and then remove the ladyfingers from the baking sheet with a metal spatula while still hot, and cool on a rack.
Store them in an airtight container till required. They should keep for 2 to 3 weeks.

As you can see from all of the notes, ingredients and recipes above, this was quite an undertaking and took a lot of backwards planning. I started by making my marascarpone cheese and lady fingers first.

Unfortuntalely, I don't have many photos of my cheese-making process, but it came out beautifully. I had some trouble getting it up to temperature, and I ended up cooking it nearly twice as long as recommended. I also had to use ultra-pasteurized whipping cream as it was the only kind I could find around here.


The finished product!


The lady fingers process came out very well too. I was worried about the folding, but they baked up light and airy with a crunchy outer shell.

My beautifully beaten egg whites...

Ready to pipe!

Next time, I would be a bit more precise when piping out the batter.

The following day, I made my zabaglione and pastry cream. Both of them came together very well.

The finished zabaglione
The finished pastry cream

I finished both of these and let them cool in the refrigerator overnight. The following day, I beat up my whipping cream to finish the tiramisu. Unfortunately, my whipping cream didn't want to set up right (I think due to the weather) so my finished product was a tad runny.


Despite all of the work it took to get to the final product, the flavor was incredible! My husband and I ended up enjoying the tiramisu as part of our Valentine's Dinner. It was well worth all of the hard work!

Wednesday, January 27, 2010

February Daring Bakers - Nanaimo Bars & Graham Crackers

Personally, I wasn't too crazy about this month's Daring Bakers Challenge. It was nice to have something a bit easier so to speak after last month's very time consuming Gingerbread Houses, but I didn't think the Nanaimo Bars would offer much of a kitchen challenge. I did though think it would be fun to make my own graham crackers.

Since I do not have celiac disease, I decided to stick with the original recipe for graham crackers containing wheat.

Graham Cracker Recipe

2 1/2 cups plus 2 tablespoons unbleached pastry flour or unbleached all-purpose flour

1 cup dark brown sugar, lightly packed
1 teaspoon baking soda
3/4 teaspoon kosher salt
7 tablespoons (3 1/2 ounces) unsalted butter, cut into 1-inch cubes and frozen
1/3 cup mild-flavored honey, such as clover
5 tablespoons whole milk
2 tablespoons pure vanilla extract


For the topping:
3 tablespoons granulated sugar
1 teaspoon ground cinnamon


In the bowl of a food processor fitted with the steel blade or in the bowl of an electric mixer fitted with the paddle attachment, combine the flour, brown sugar, baking soda, and salt. Pulse or mix on low to incorporate. Add the butter and pulse on and off on and off, or mix on low, until the mixture is the consistency of a coarse meal.


In a small bowl, whisk together the honey, milk, and vanilla extract. Add to the flour mixture and pulse on and off a few times or mix on low until the dough barely comes together. It will be very soft and sticky.


Turn the dough out onto a lightly floured work surface and pat the dough into a rectangle about 1 inch thick. Wrap in plastic and chill until firm, about 2 hours or overnight.

To prepare the topping: In a small bowl, combine the sugar and cinnamon, and set aside.
(I found the dough to be incredibly dry. Upon rolling it out, I had to knead in a few drops of water to make it pliable.)


Divide the dough in half and return one half to the refrigerator. Sift an even layer of flour onto the work surface and roll the dough into a long rectangle about 1/8 inch thick. The dough will be sticky, so flour as necessary. Trim the edges of the rectangle to 4 inches wide. Working with the shorter side of the rectangle parallel to the work surface, cut the strip every 4 1/2 inches to make 4 crackers. Gather the scraps together and set aside. Place the crackers on one or two parchment-lined baking sheets and sprinkle with the topping. Chill until firm, about 30 to 45 minutes. Repeat with the second batch of dough.


Adjust the oven rack to the upper and lower positions and preheat the oven to 350 degrees.


Gather the scraps together into a ball, chill until firm, and reroll. Dust the surface with more flour and roll out the dough to get about two or three more crackers.


Mark a vertical line down the middle of each cracker, being careful not to cut through the dough. Using a toothpick or skewer, prick the dough to form two dotted rows about 1/2 inch for each side of the dividing line.


Bake for 25 minutes, until browned and slightly firm to the tough, rotating the sheets halfway through to ensure even baking. (For my oven, 25 minutes was entirely too long, and I ended up burning the first batch. I had to cut about 3-5 minutes off the baking time.)


Yield: 10 large crackers (I found that I had about double this amount)


I'm not going to lie, I cheated on the second part of the challenge. For the Nanaimo Bars, I used boxed graham crackers. My dad made his bars a week before I did, and he told me the delicious flavor of the homemade graham crackers was lost in the Nanaimo Bars. After all of the work for the graham crackers, I didn't want them to go to waste in the Nanaimo Bars. I decided to keep the graham crackers to eat for snacks and used boxed crackers for the bars.

Nanaimo Bars


Ingredients:

For Nanaimo Bars — Bottom Layer
1/2 cup (115 g) (4 ounces) Unsalted Butter
1/4 cup (50 g) (1.8 ounces) Granulated Sugar
5 tablespoons (75 mL) Unsweetened Cocoa
1 Large Egg, Beaten
1 1/4 cups (300 mL) (160 g) (5.6 ounces) Gluten Free Graham Wafer Crumbs (See previous recipe)
1/2 cup (55 g) (1.9 ounces) Almonds (Any type, Finely chopped)
1 cup (130 g) (4.5 ounces) Coconut (Shredded, sweetened or unsweetened)

For Nanaimo Bars — Middle Layer
1/2 cup (115 g) (4 ounces) Unsalted Butter
2 tablespoons and 2 teaspoons (40 mL) Heavy Cream
2 tablespoons (30 mL) Vanilla Custard Powder (Such as Bird’s. Vanilla pudding mix may be substituted.)
2 cups (254g) (8.9 ounces) Icing Sugar

For Nanaimo Bars — Top Layer
4 ounces (115 g) Semi-sweet chocolate
2 tablespoons (28 g) (1 ounce) Unsalted Butter

Directions:


1. For bottom Layer: Melt unsalted butter, sugar and cocoa in top of a double boiler. Add egg and stir to cook and thicken. Remove from heat. Stir in crumbs, nuts and coconut. Press firmly into an ungreased 8 by 8 inch pan.


2. For Middle Layer: Cream butter, cream, custard powder, and icing sugar together well. Beat until light in colour. Spread over bottom layer.


 3. For Top Layer: Melt chocolate and unsalted butter over low heat. Cool. Once cool, pour over middle layer and chill.

I thought the bars were delicious and incredibly sweet! My husband devoured them!